Tag Archives: Zero Waste Sewing

Patchwork Denim Whale Jacket

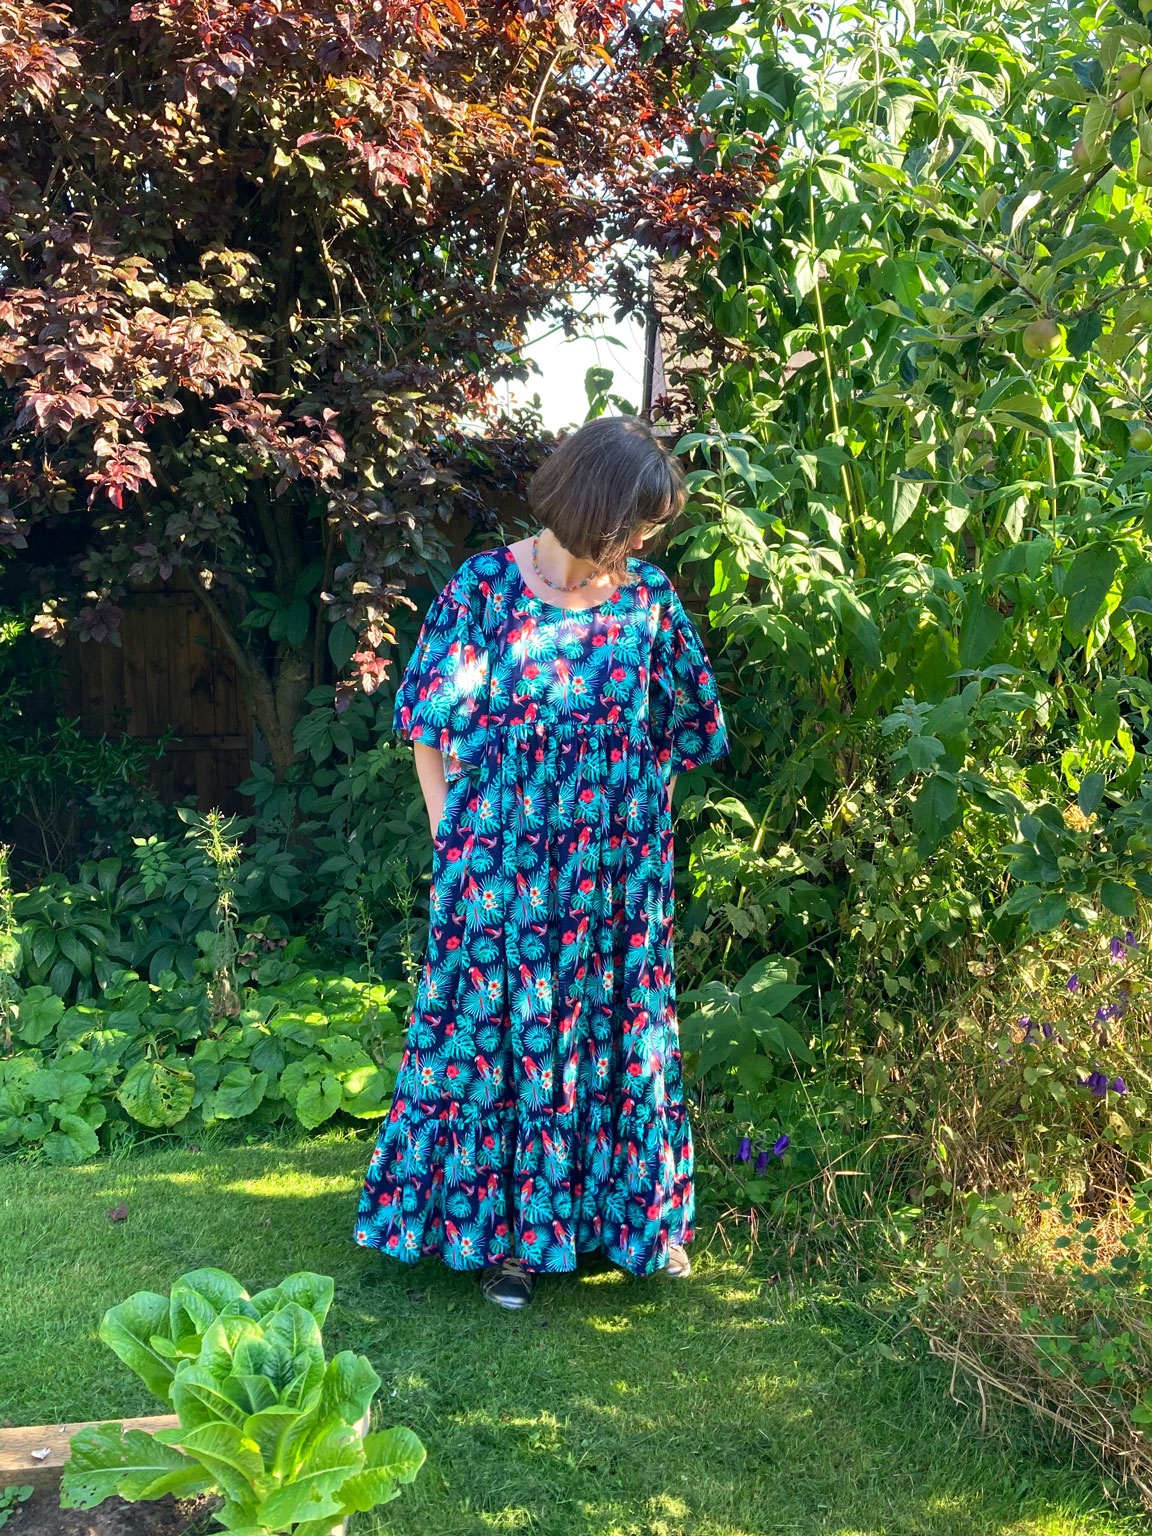
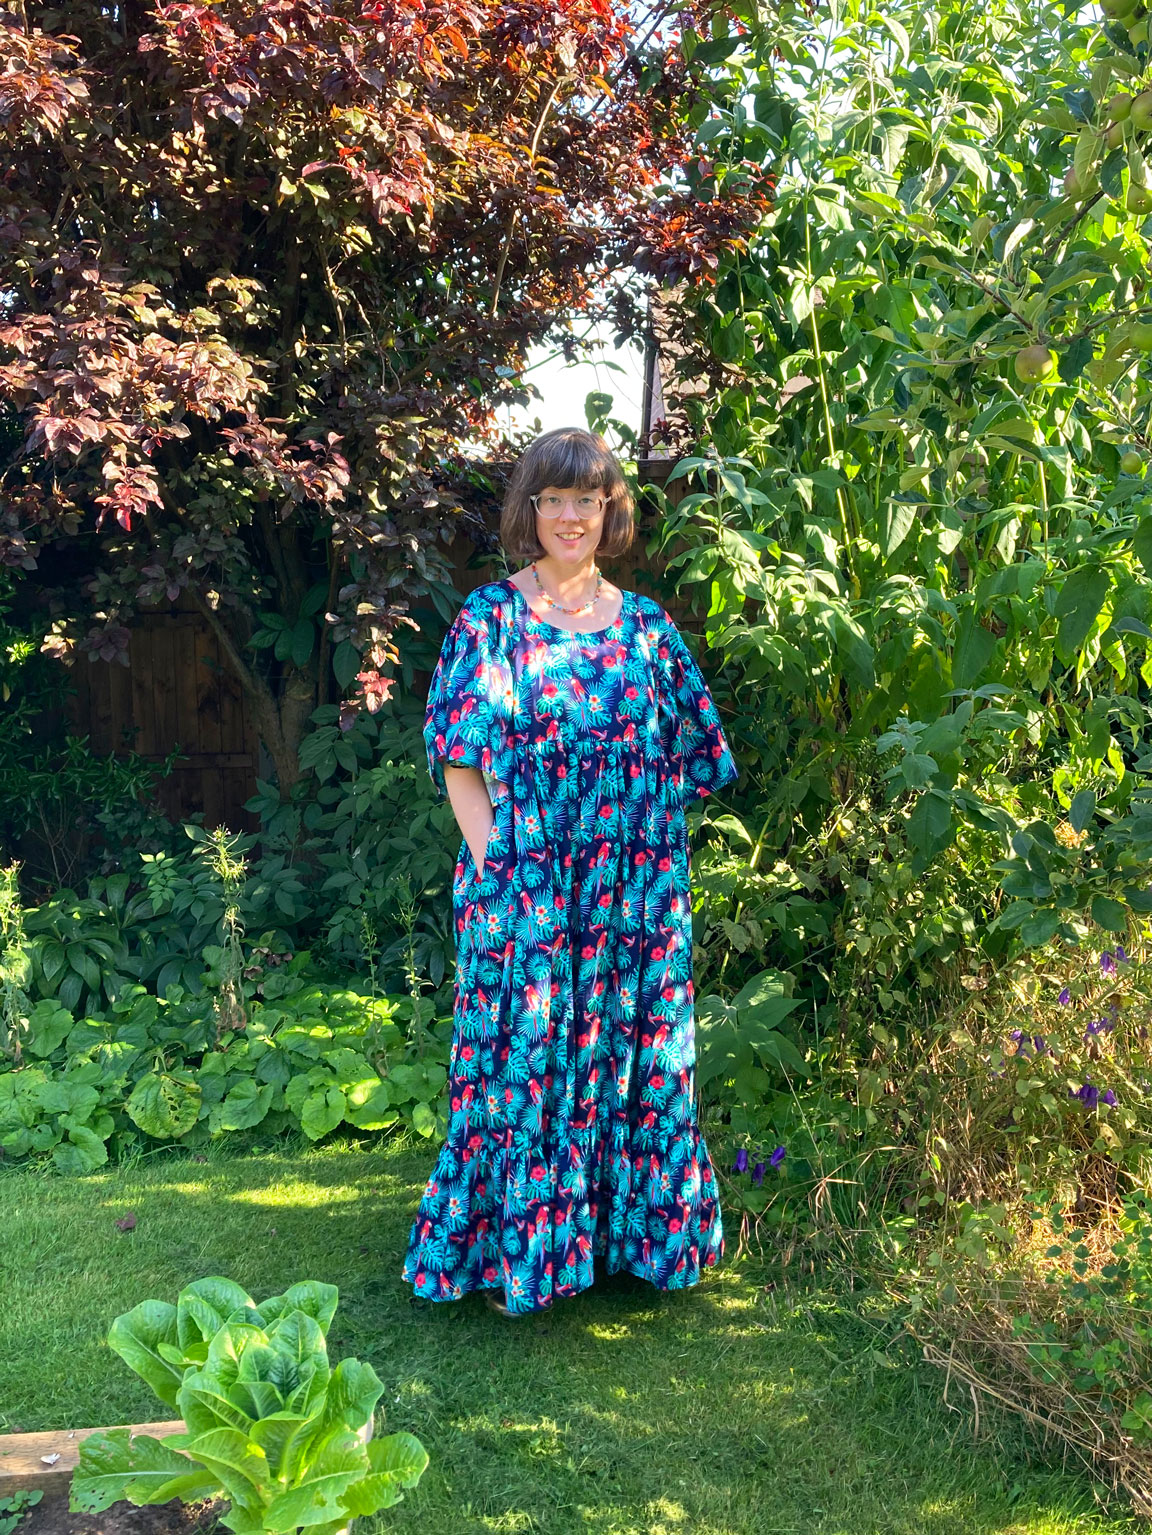
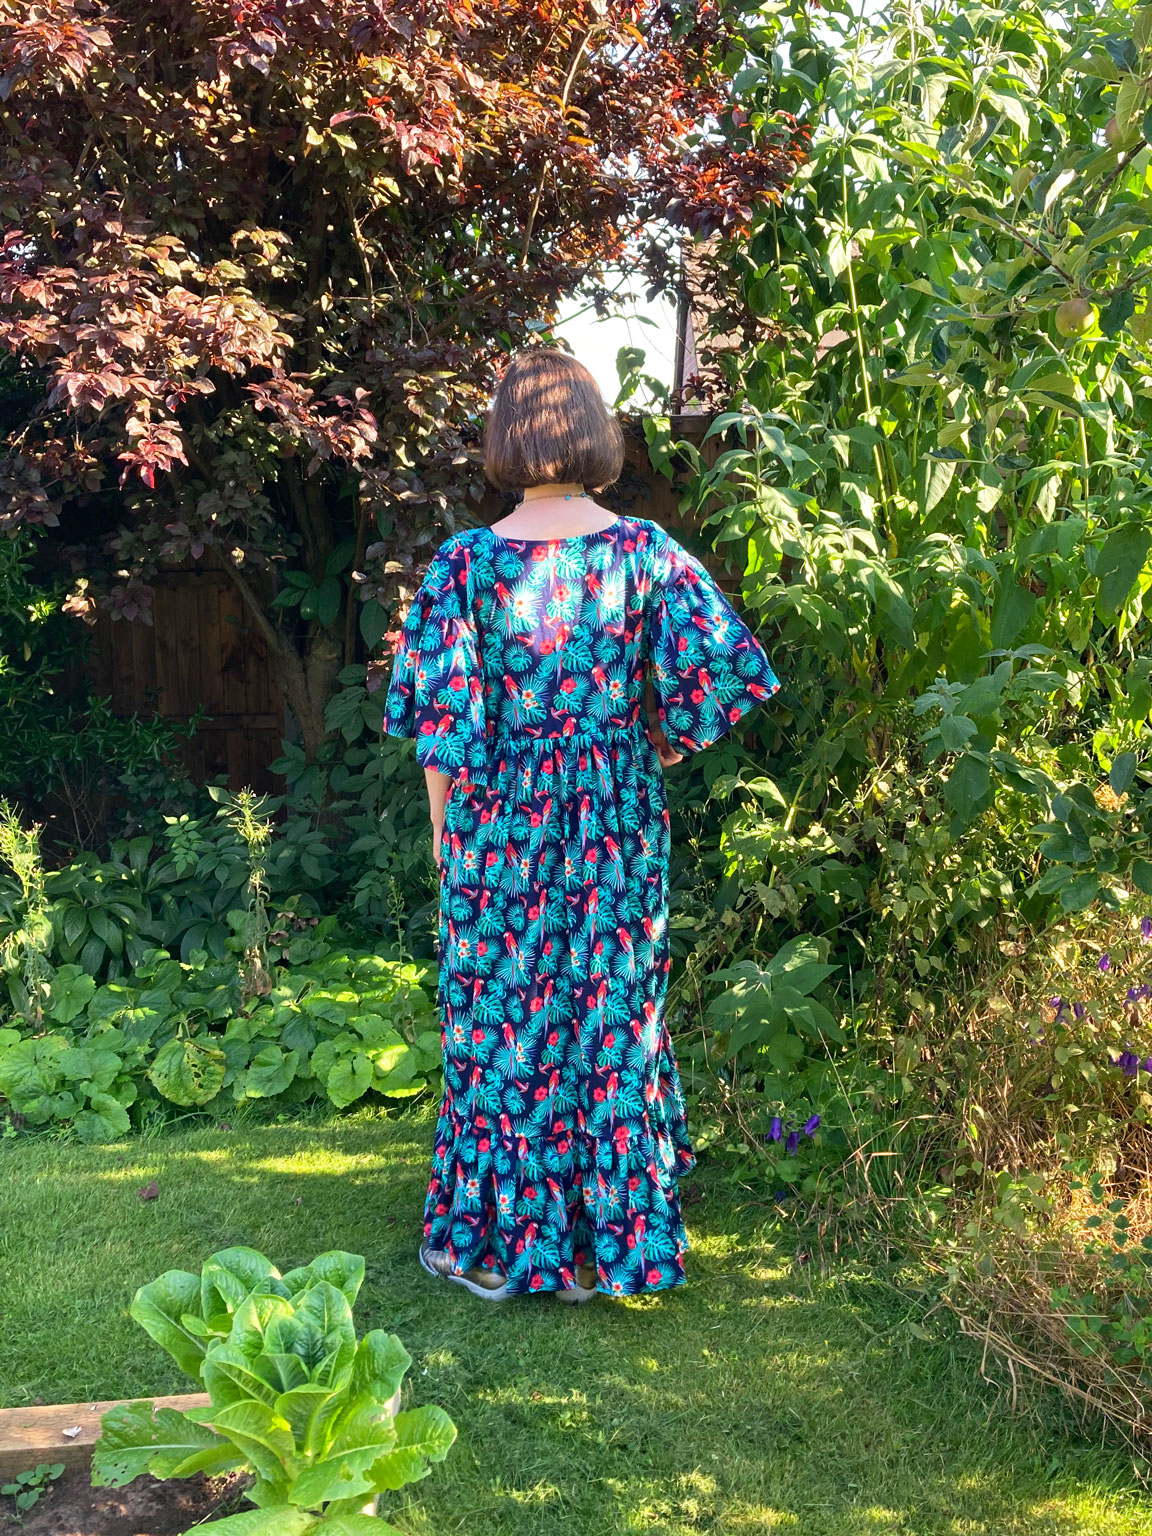
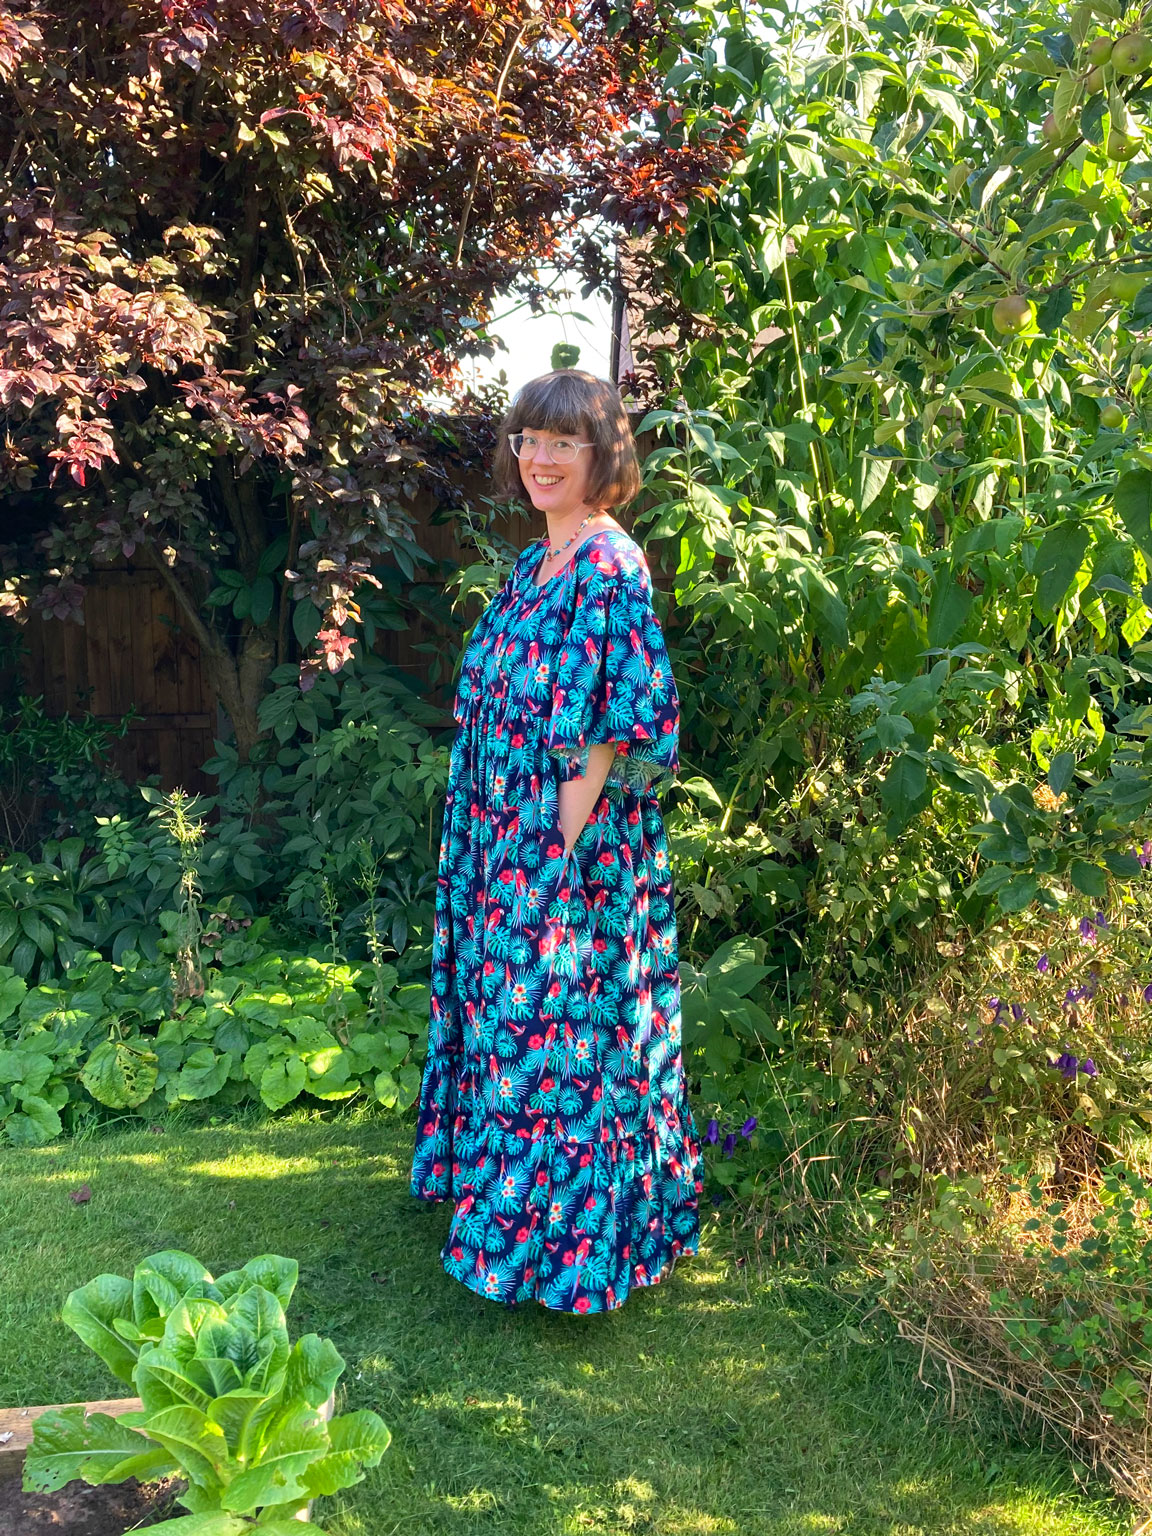
Long time no update! But I have a few old makes to share and lots of plans for new makes so hopefully I’ll be around a bit more this year than last year!

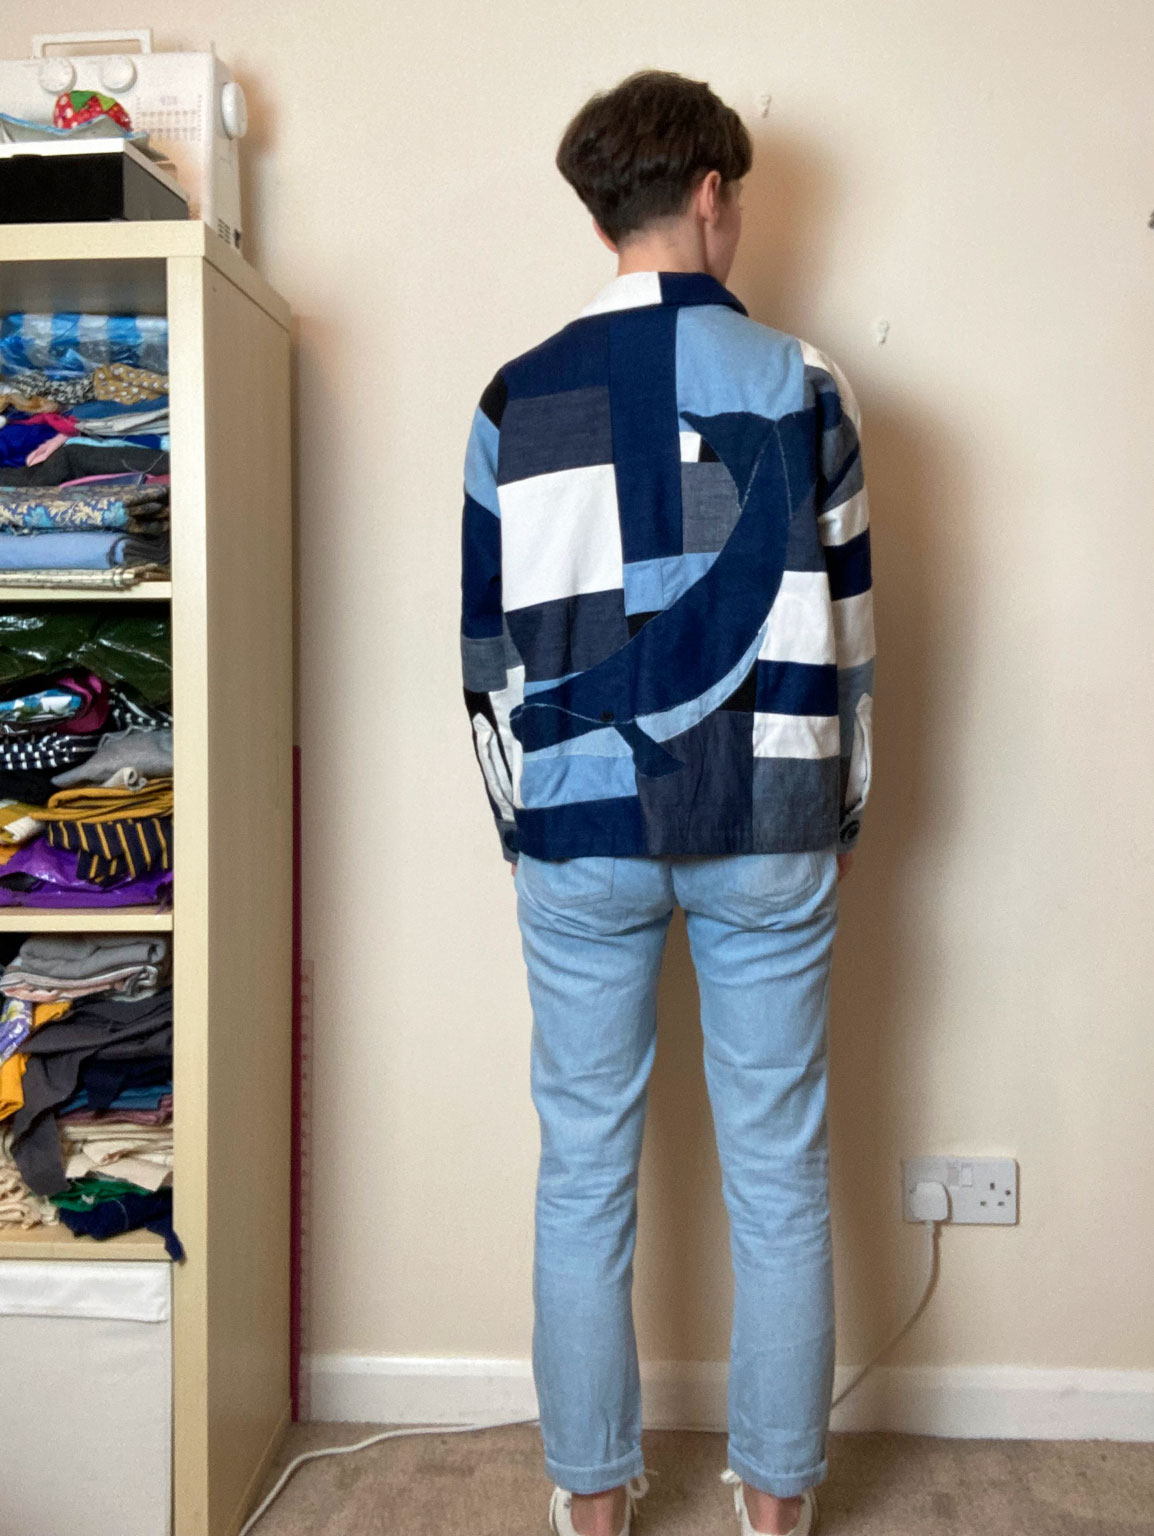
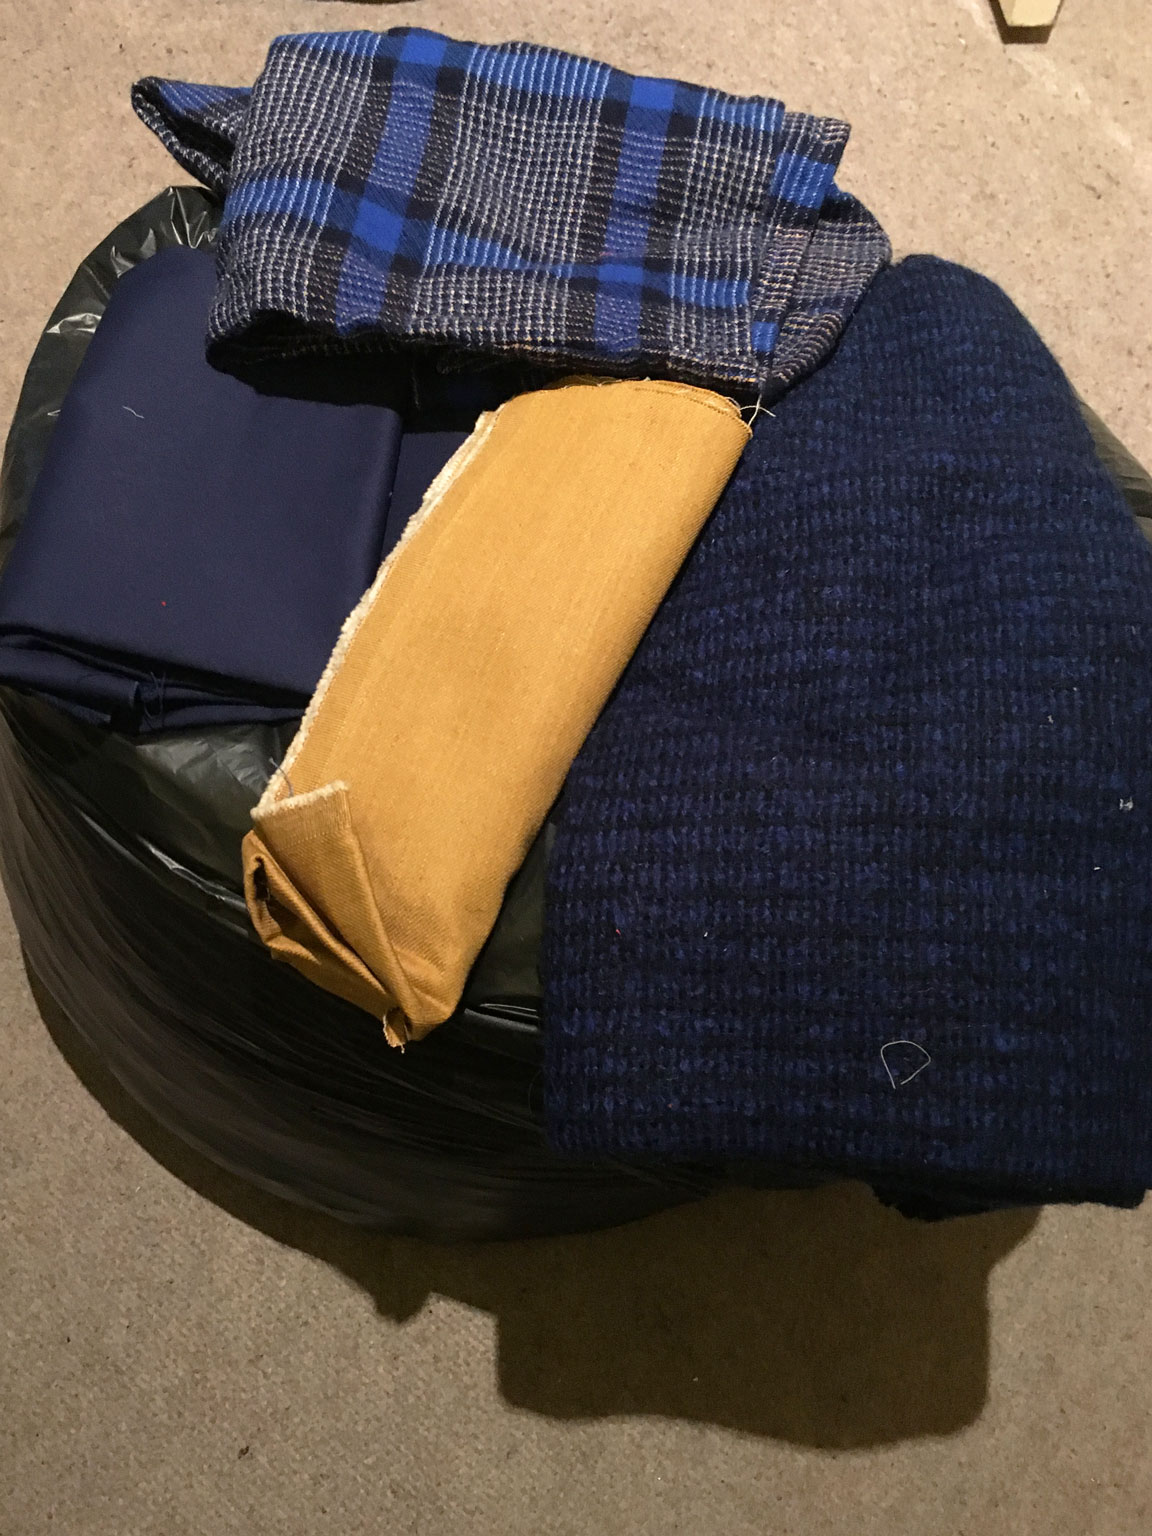
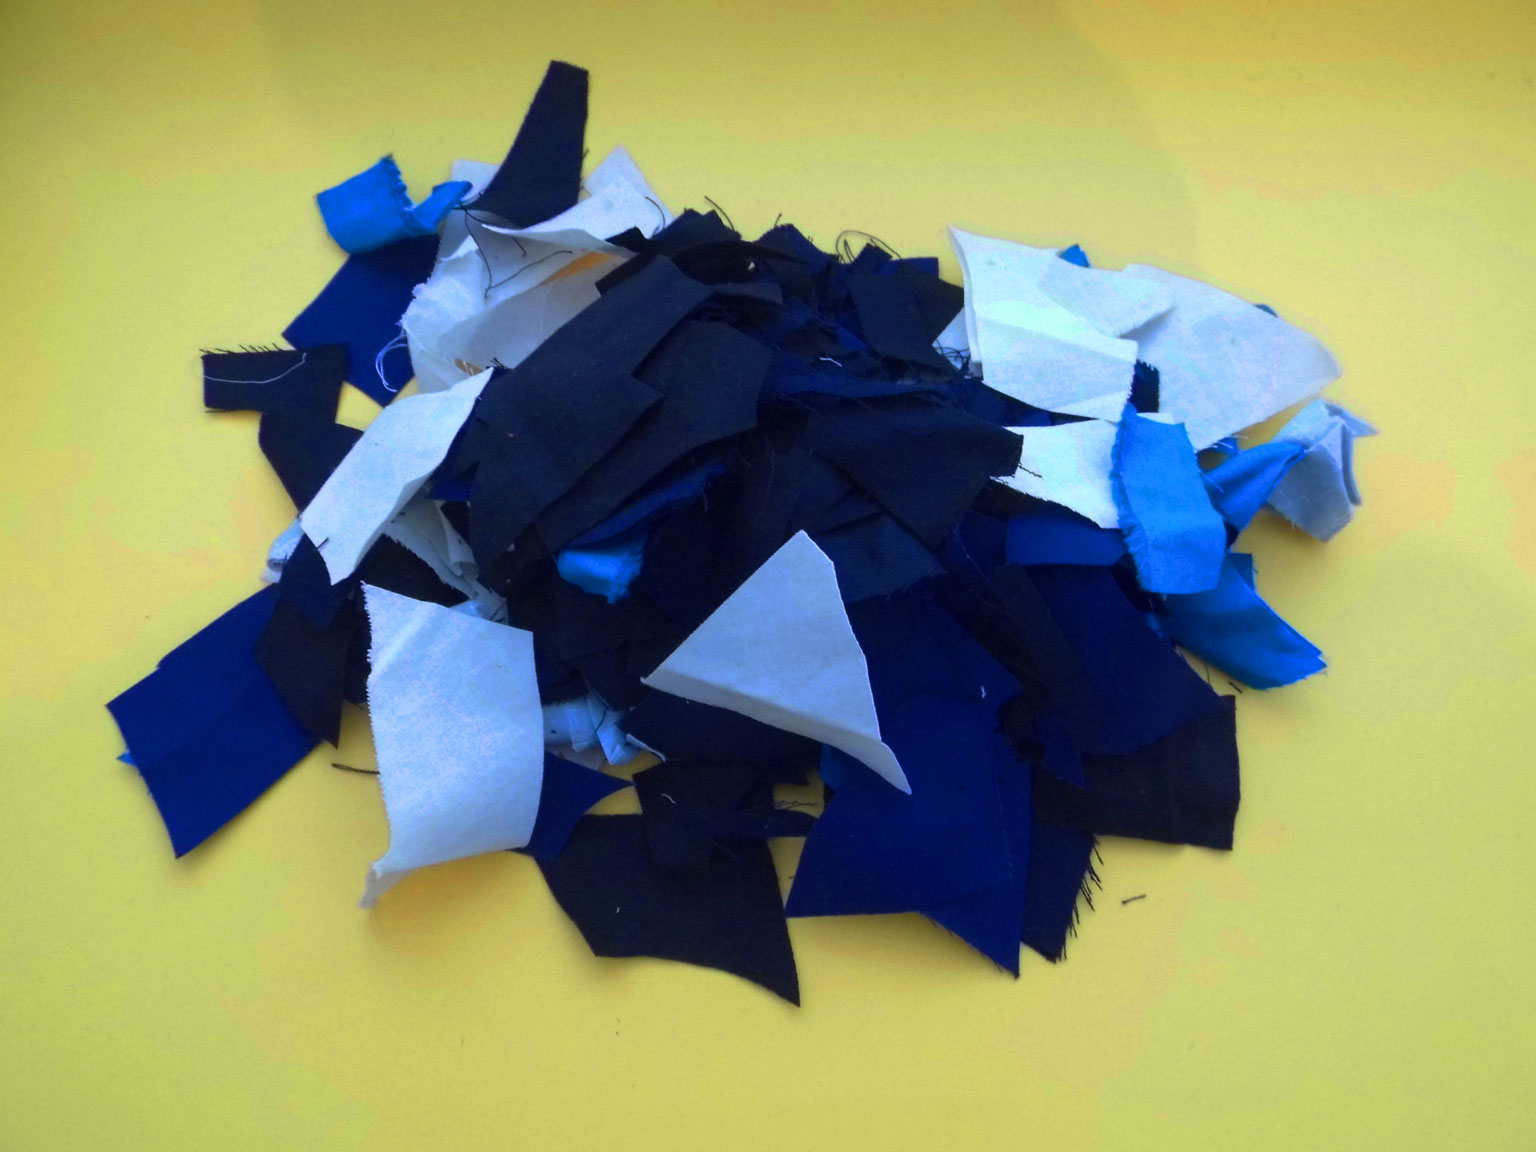
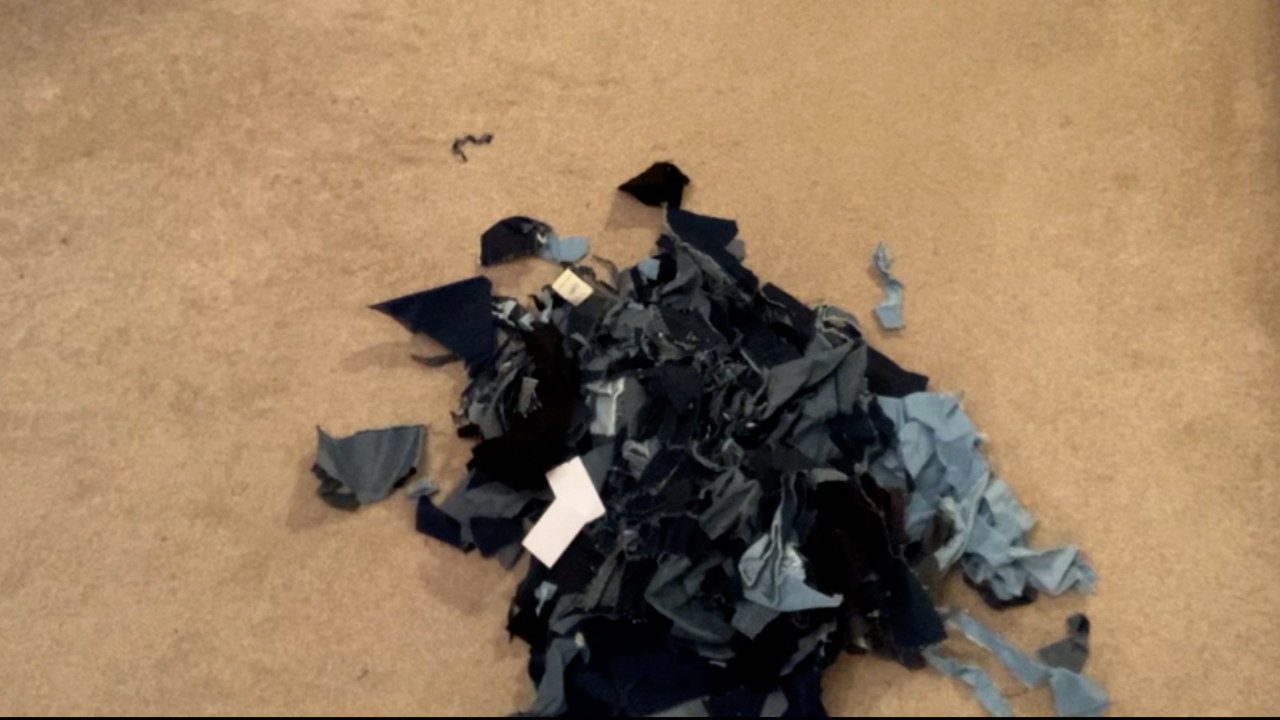
A while ago, at the beginning of the pandemic when I was furloughed, I sewed a bunch of pairs of jeans (have a look at my archive page for deets). This means I ended up with lots of denim scraps. I decided I wanted to make a patchwork denim jacket from these scraps. I was mostly inspired by Raph on the Sewing Bee when they did the reduce, reuse, recycle week and he made a patchwork denim dress with a whale on it.

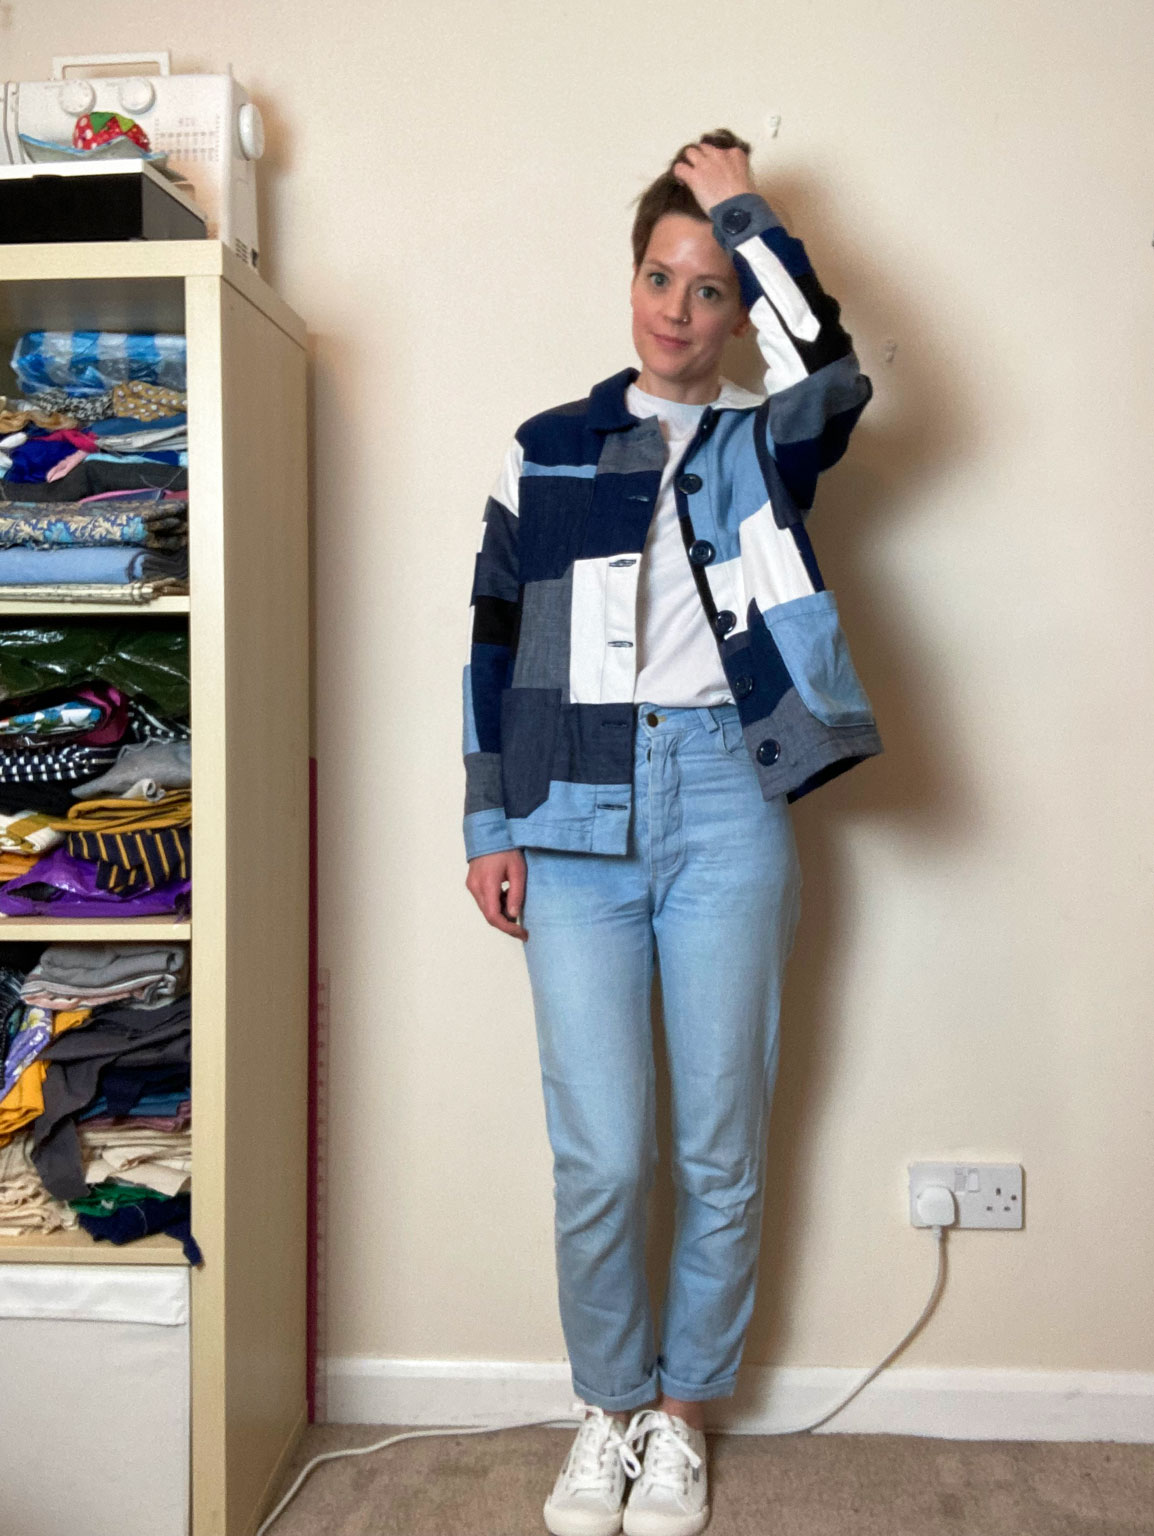
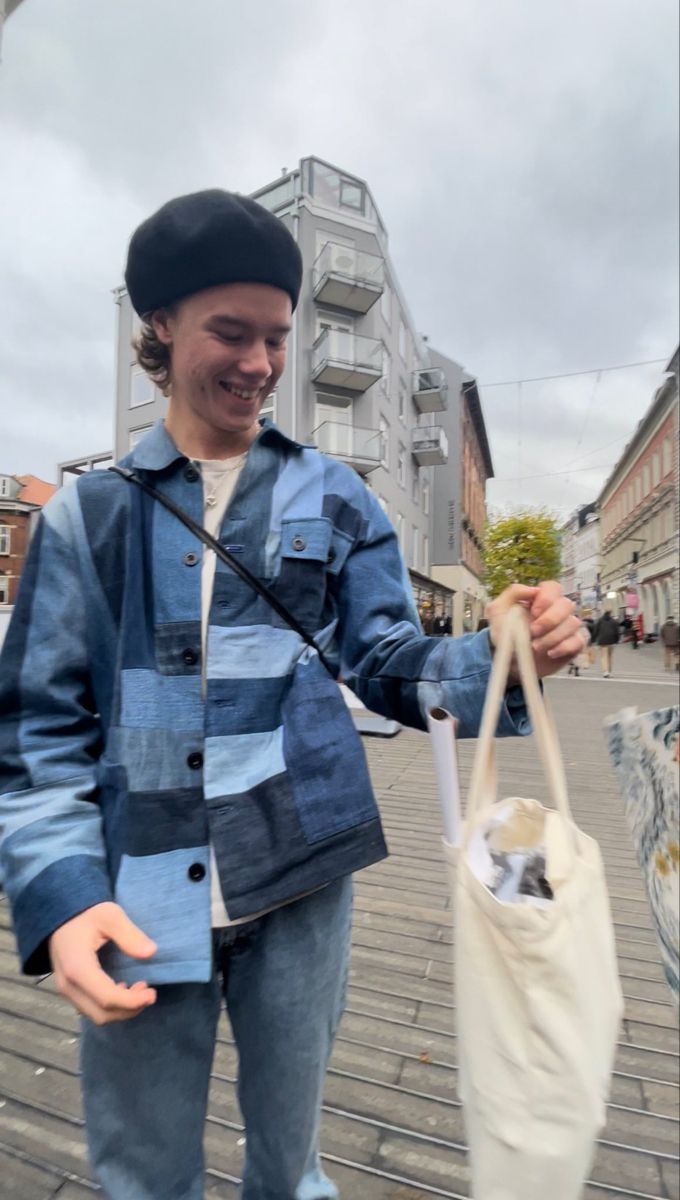
The jacket went through a couple of iterations – at one point I was going to try to make a picture from the denim, but my skills are not good enough for ‘painting’ with fabric! But then like a lot of the world I watched the first series (and there has since been a second) of Young Royals on Netflix and became a little obsessed with this jacket that Edvin wore a good few times. And it was like destiny! I did buy a pair of white jeans from a charity shop to help break up the blues.

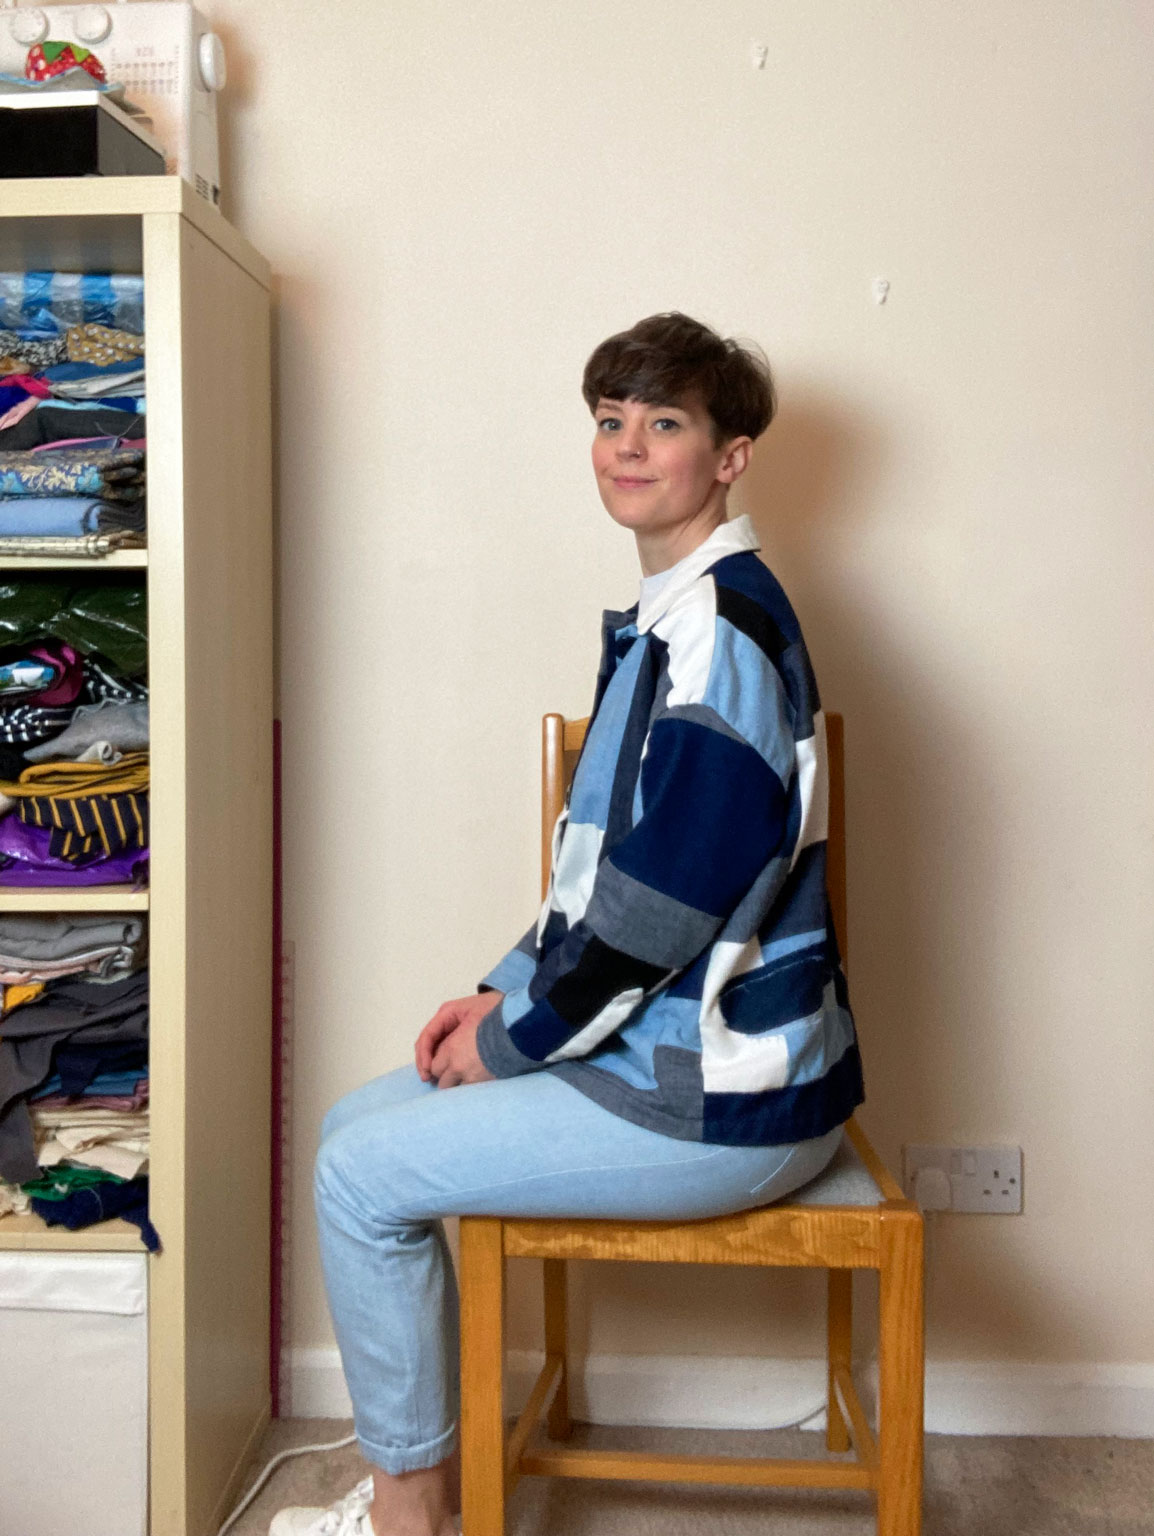
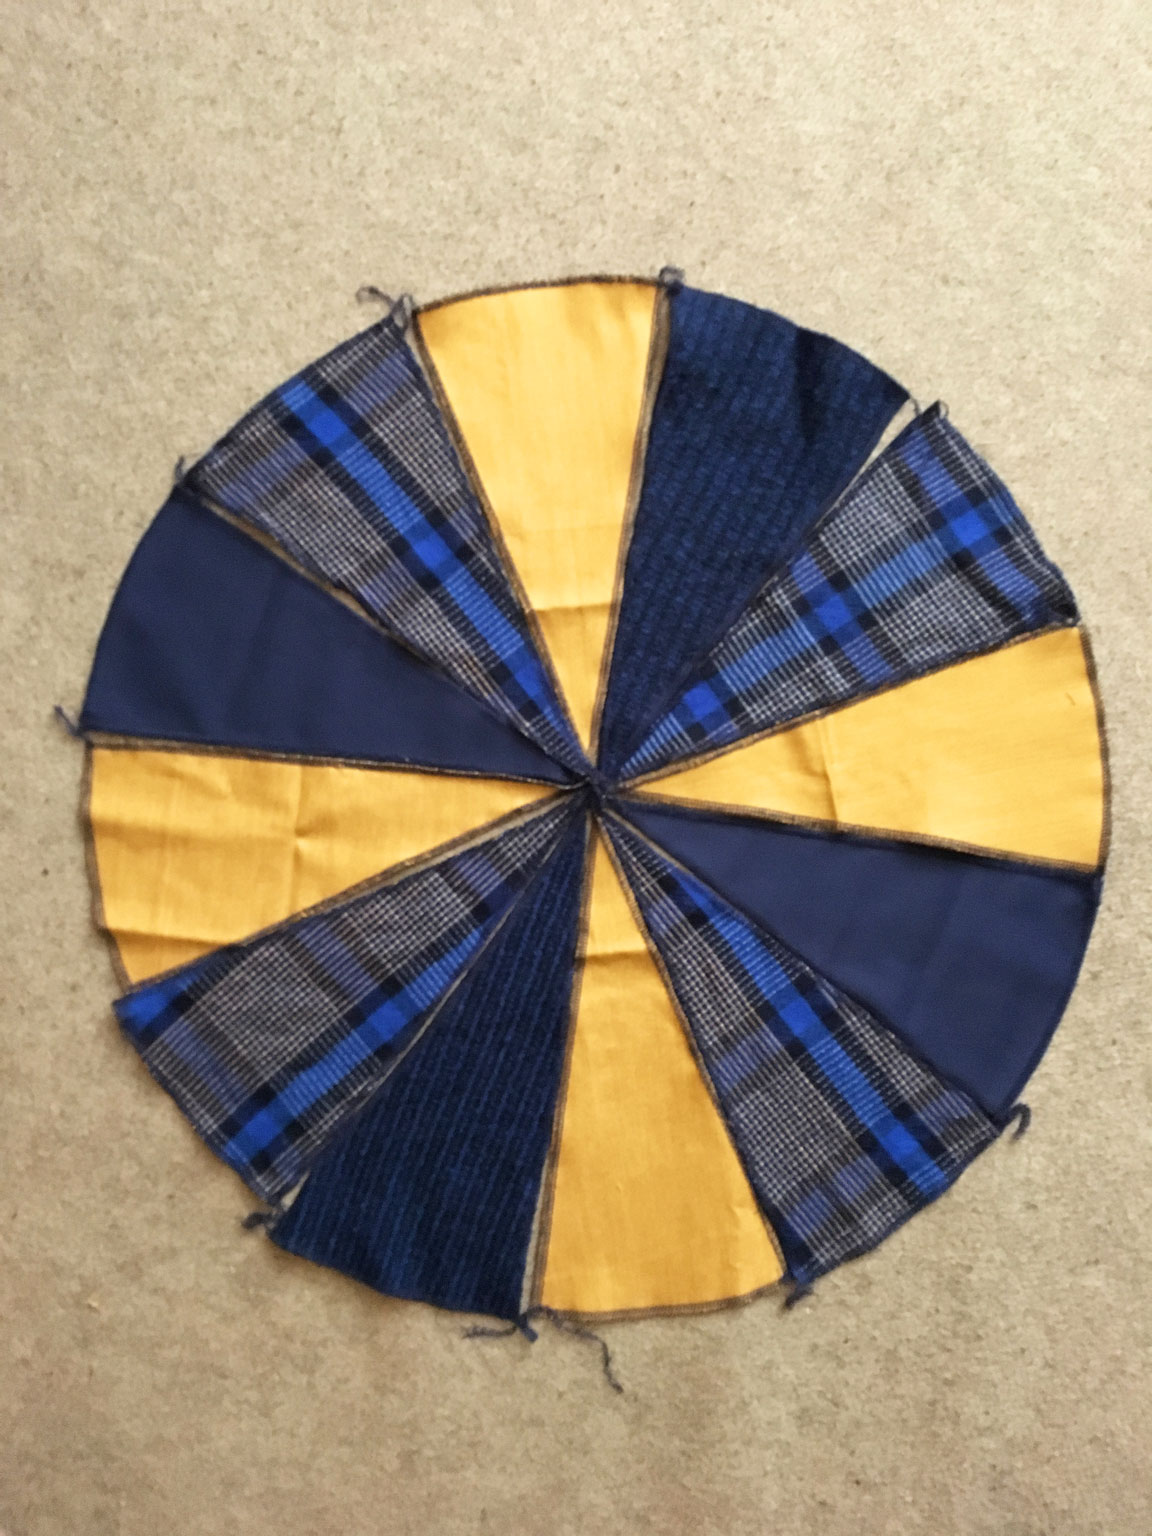
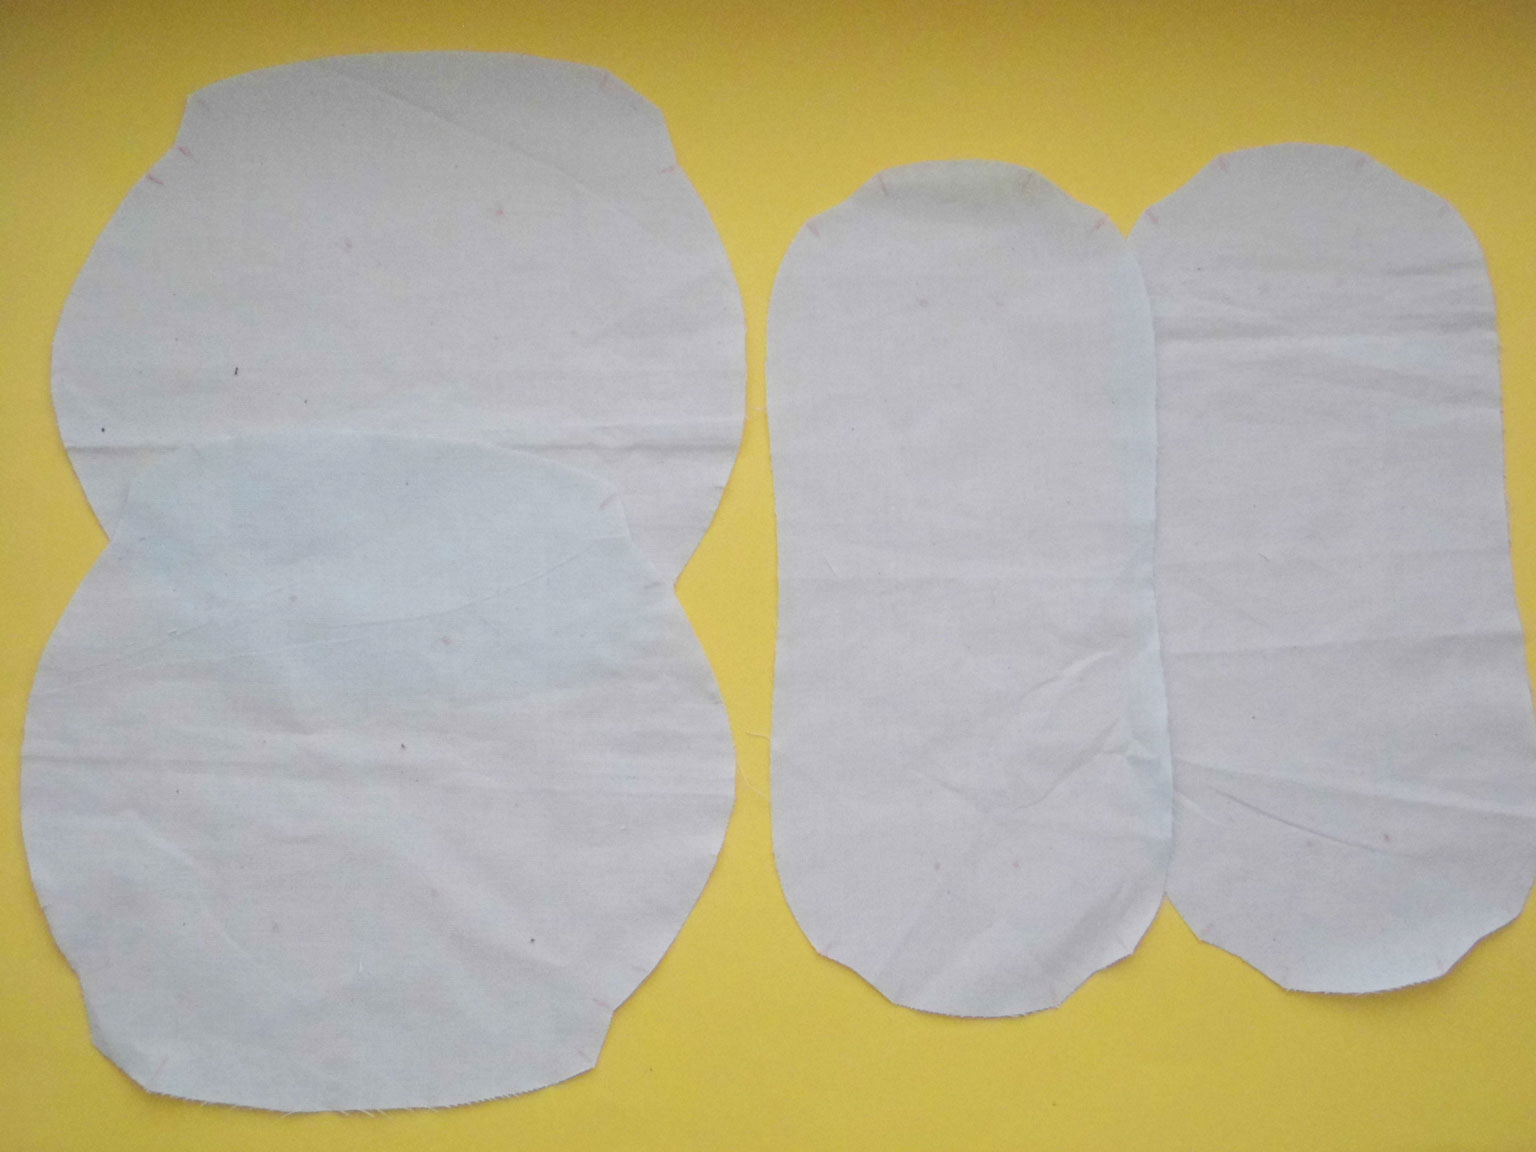
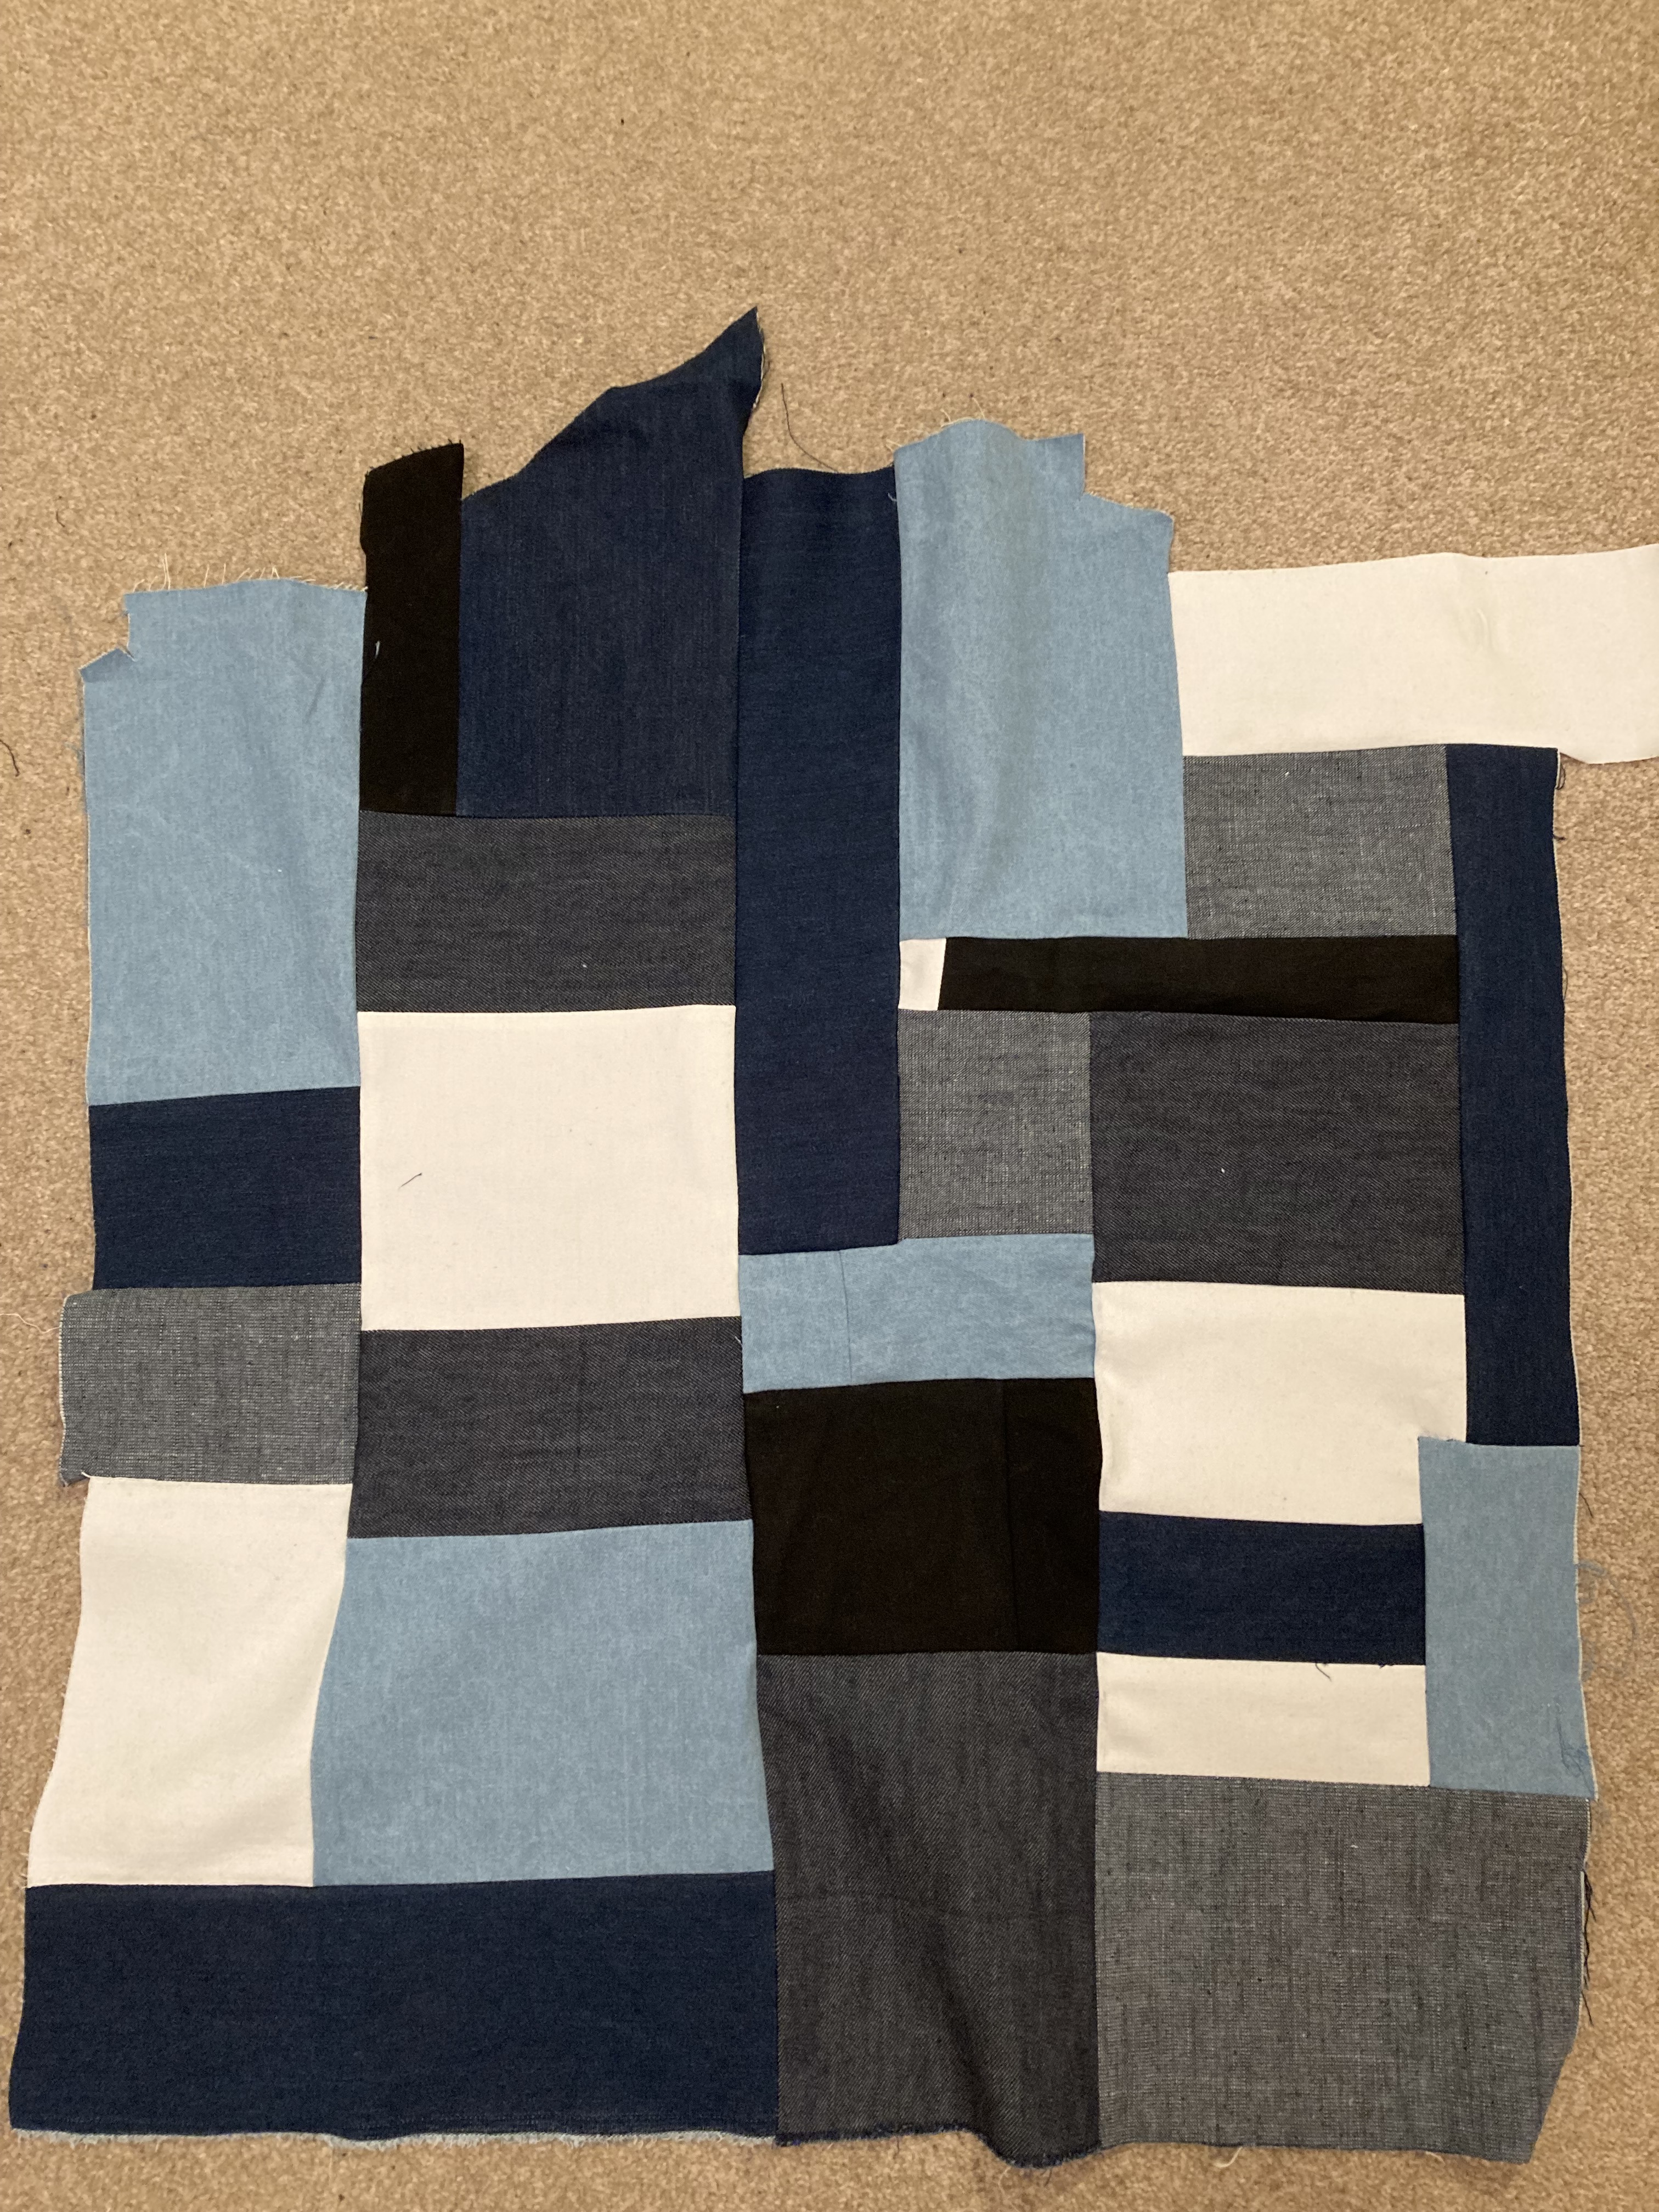
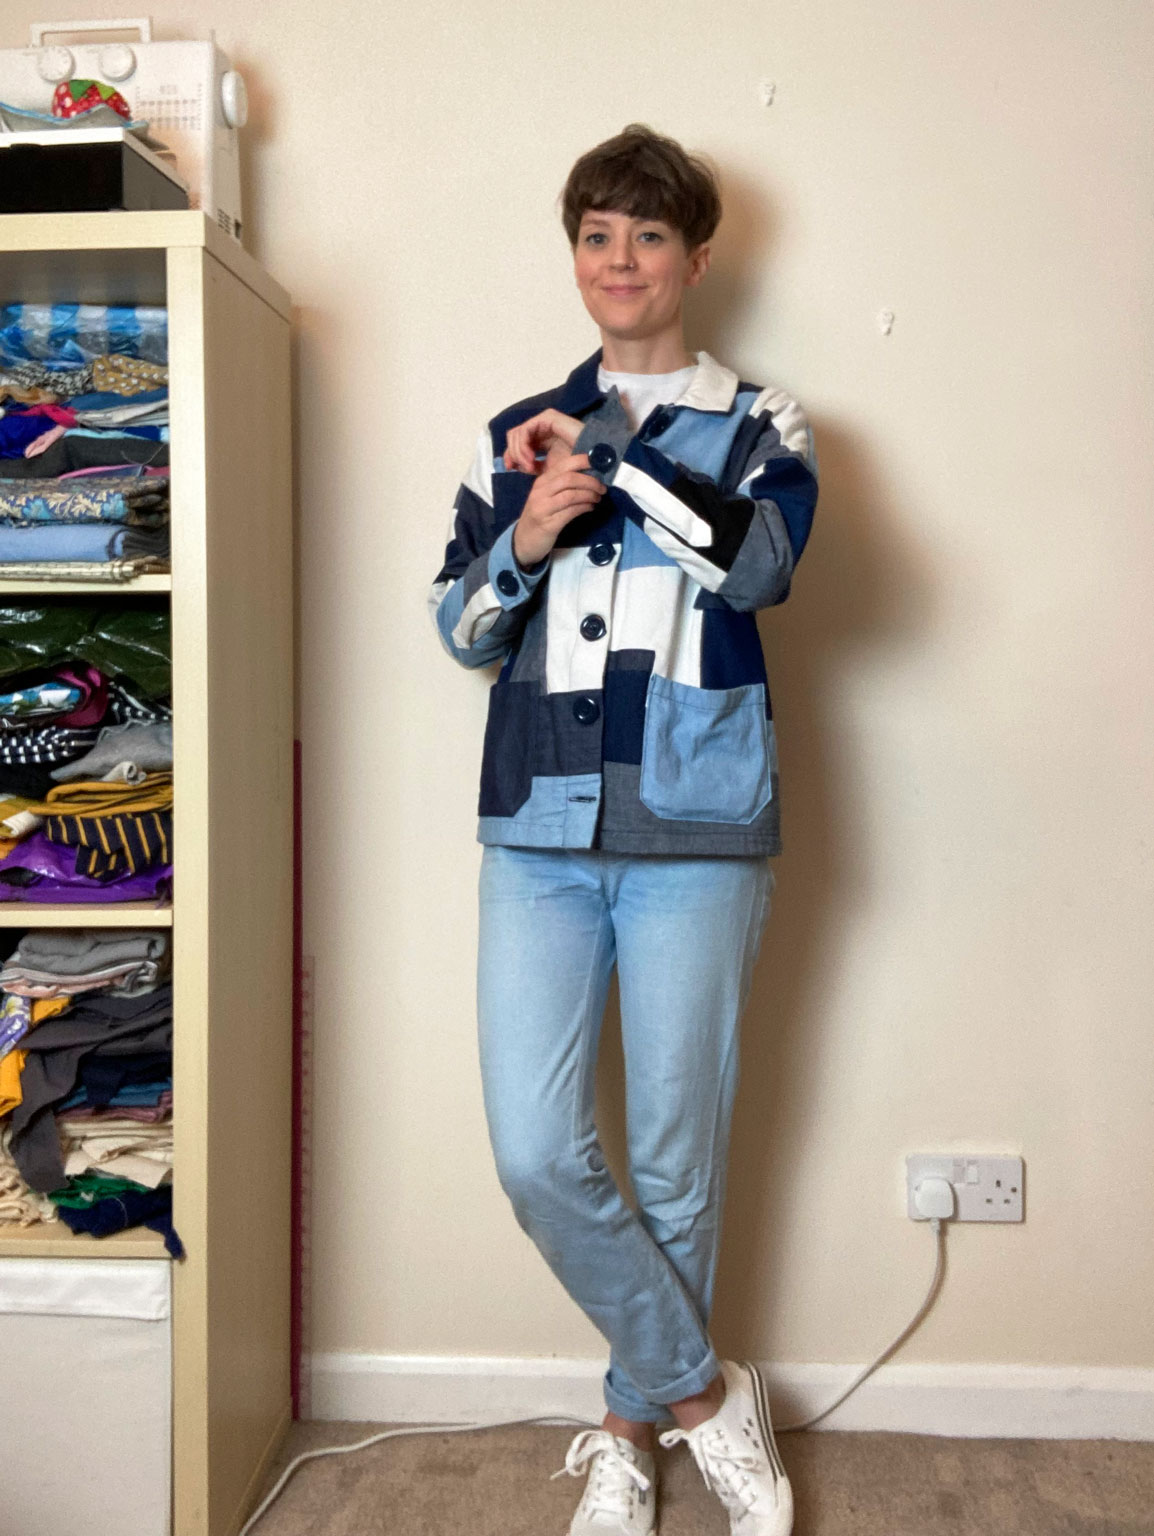
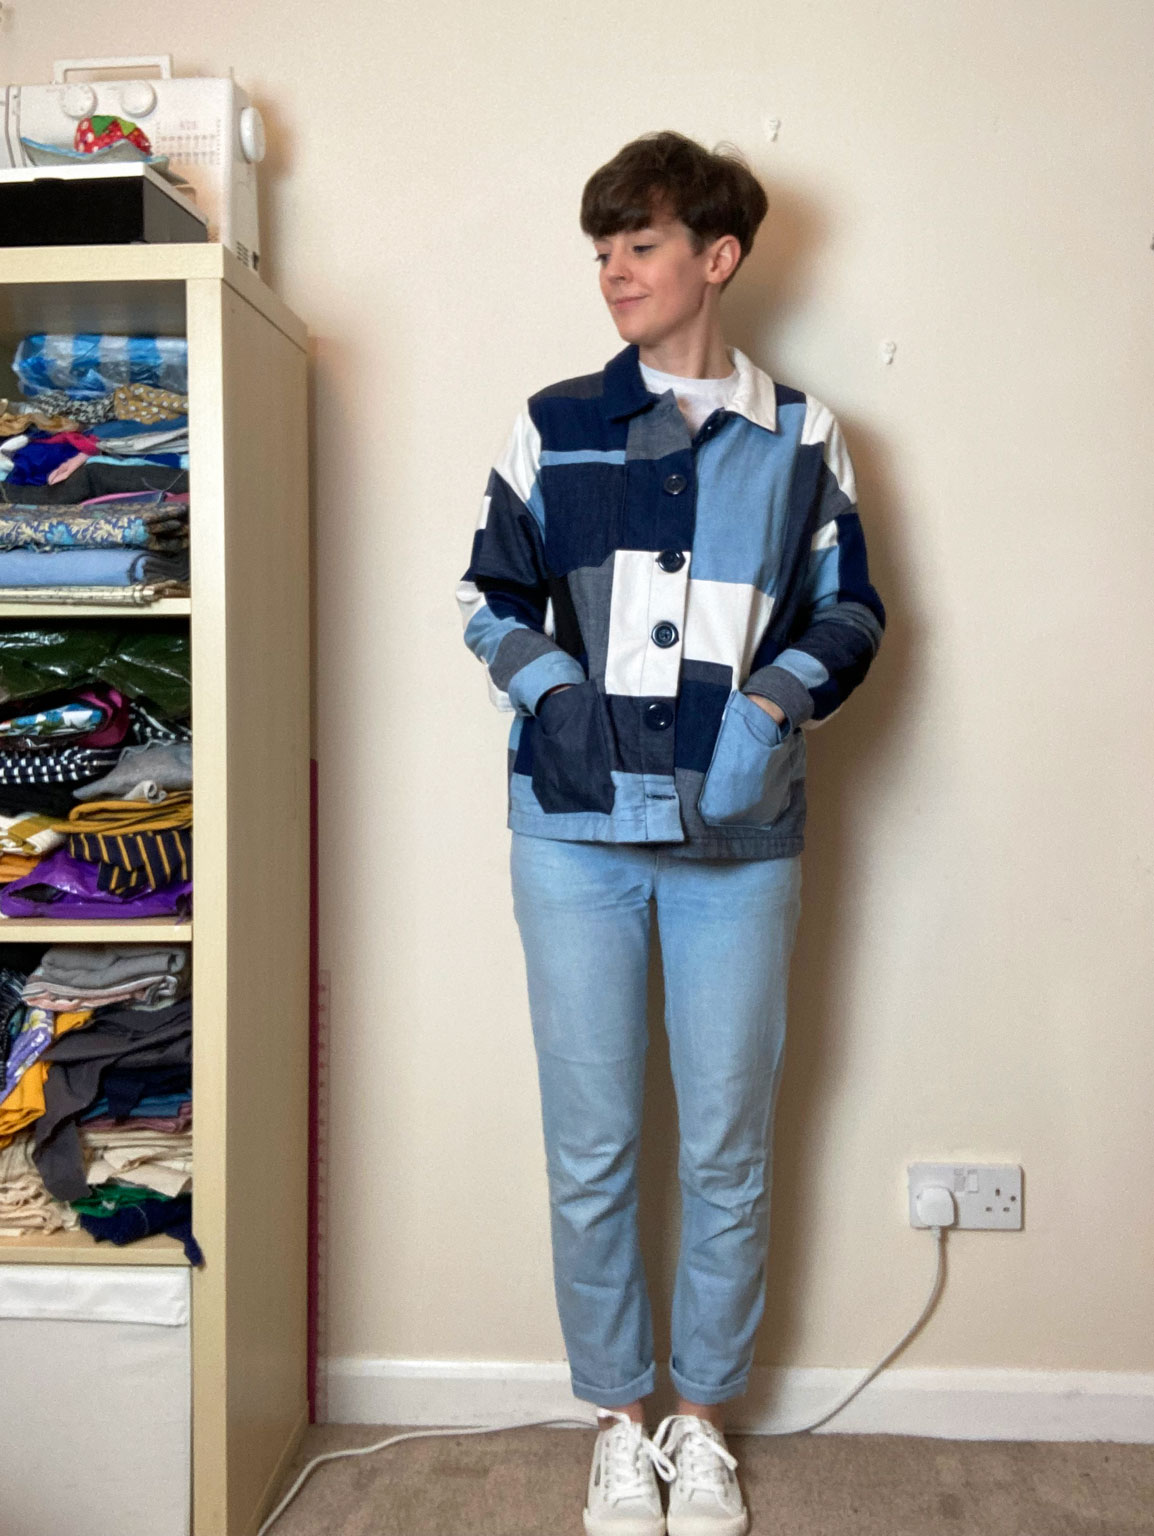
I decided to use the Friday Pattern Company’s Ilford Jacket pattern (which I made once before for my brother in law) and I made the chunks of patchwork according to the size of each pattern piece, so I didn’t waste as much fabric by making one massive sheet of patchwork! The below is the back. I cut random pieces and just tried to assemble them in a way which meant no 2 pieces of the same colour were next to each other. I did have 2 quite dark blue denims but they look a tiny bit different.

I actually finished this jacket at the end of 2021 and never got around to photographing it. Oops. Anyhoo. This is how it turned out. And I LOVE IT!

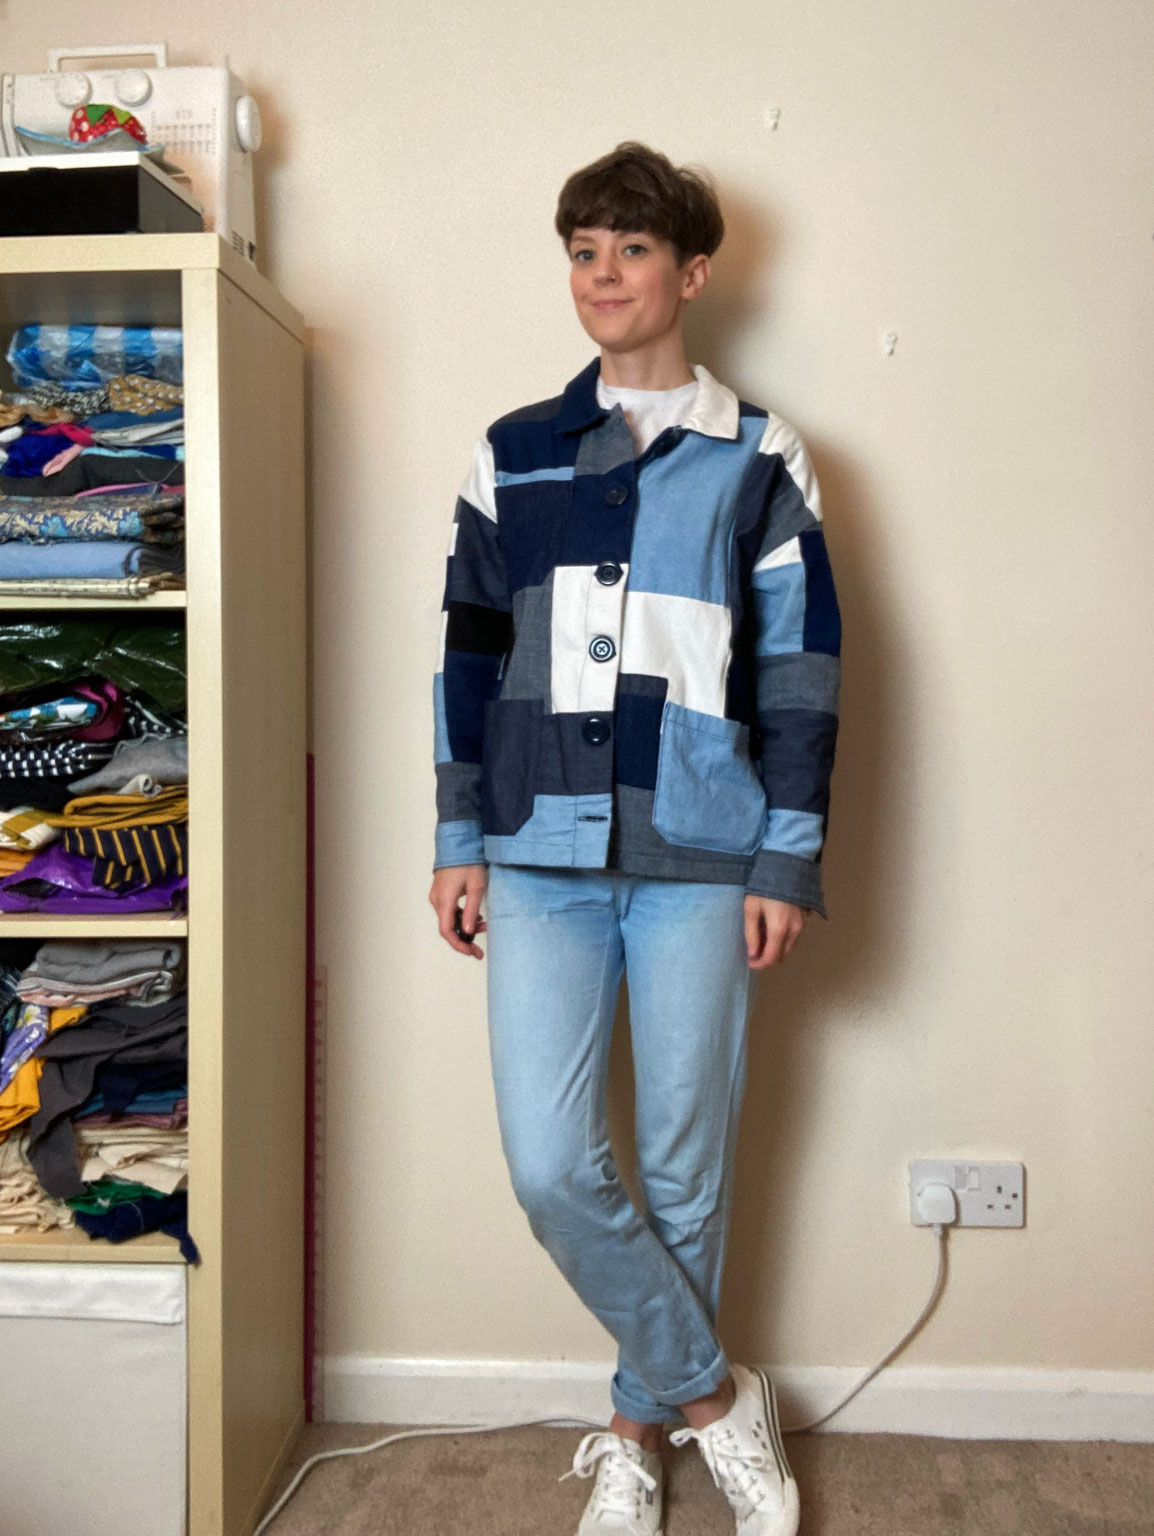
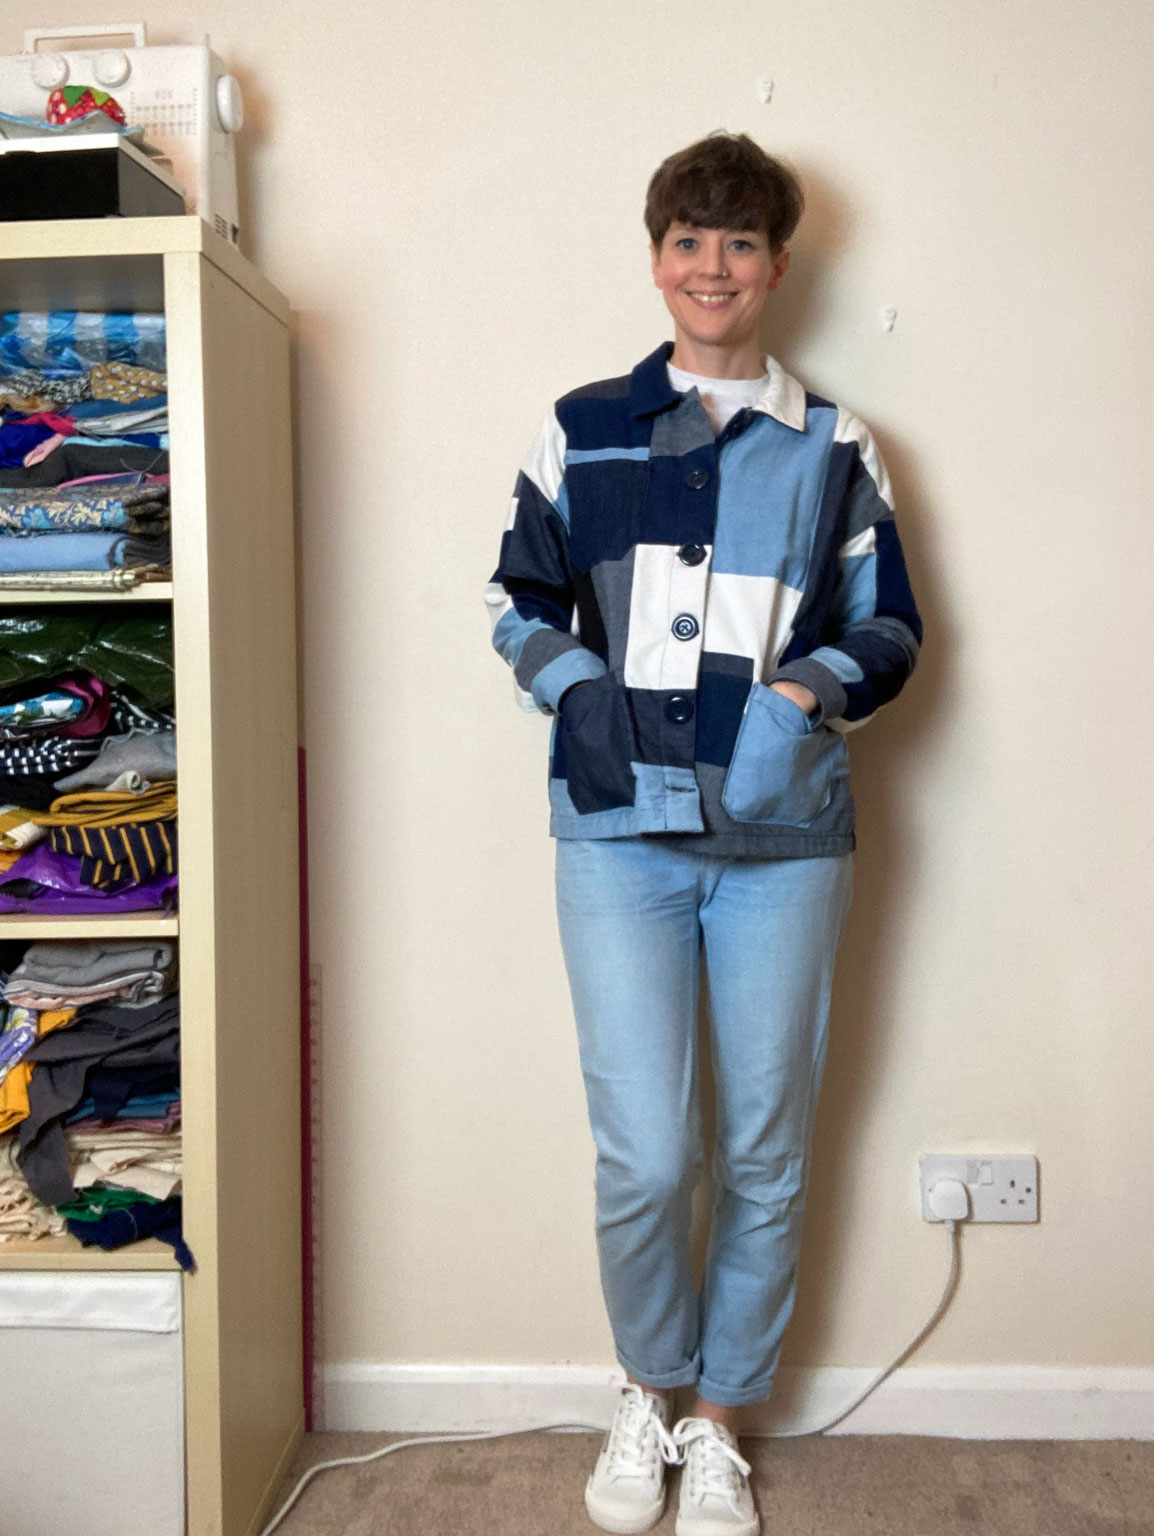
I did the patch pockets and chose fabrics based on what would contrast in each section they belonged in.

I did both sleeve plackets in white, but the cuffs in different colours, again based on which colour would contrast best on each sleeve. I did the basic construction and then cut out the cuffs and pockets. I also underlined the whole things because there were SO MANY SEAMS on the inside!

At this point you may be thinking ‘where is the whale I was promised?’. Weeellll…..

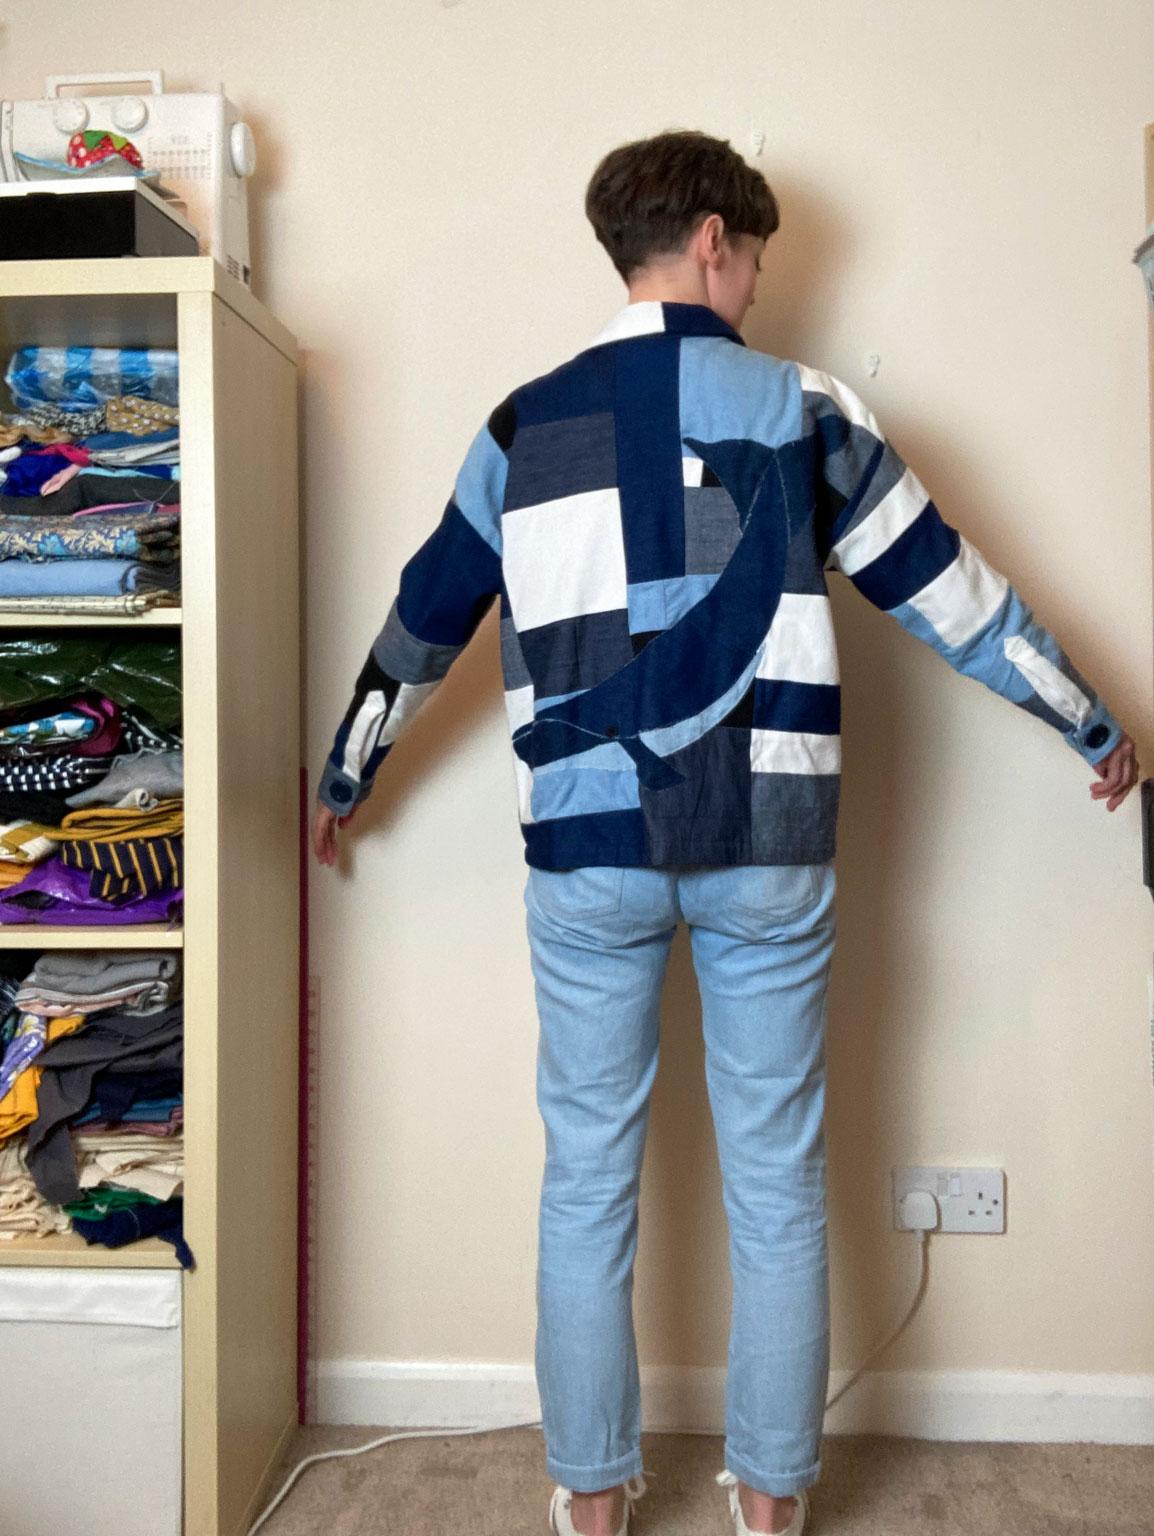
I didn’t necessarily intend to copy the whale from Raph’s dress but I’ve always loved whales, ever since I did a project on them since I was in the Brownies! I especially love blue whales. Because they’re the biggest! So my whale is based on a blue whale. Seems fitting colour-wise too!

As you can hopefully tell, I also cut the collar in 2 different colours and added seam allowance so that it would be super contrasty and I actually really like it as a design feature.

This was a stash only make, which seemed in keeping with the idea to use up my scraps. The buttons were in my stash – I feel like I took them off a rtw garment at some point but I don’t now remember when or from what. The fabric I used for the underlining was the leftover fabric I used to line my By Hand London Victoria coat hack.

I have worn this jacket a good few times (when it’s not quite as freezing as it is this week in Britain, brr!). I even got a compliment when I went to the Shakespeare Birthplace museum in Stratford Upon Avon – one of the tour guides told me she loved my style and my jacket specifically. I love getting random compliments from people – I want to try to do that more myself, because who doesn’t want to be told something nice?!

I don’t know if you can really see (I forgot to take a close up photo, sorry) but the whale has a little eye. I used a tiny bit of the black denim and zig-zag stitched all around the edge. It might be my favourite detail. And now I’m just going to spam you with loads of photos. Sorry not sorry.

A Zero Waste Dress for a Wedding

A couple of weeks ago I made this (mostly) zero waste pattern for my sister to wear to a wedding that she’s going to next year. I used the Daisy DIY Maya Dress tutorial and it was so easy to follow. The only wasted bits of fabric were the scoops you take out of the front and back necklines.

You use your own measurement to decide how but each piece needs to be. Luckily the fabric Phoebe had bought was the exact right width to get her bodice fronts and backs from one full width. The rest of the pieces used a full width too – it was a narrow width cotton. The sleeves and the ruffle at the bottom ended up being the same height, not necessarily by design but it was a happy accident. And the ruffle at the bottom was 3 widths of the fabric in total and ended up using the full length we had left. There were 3m in total of the fabric.

I honestly can’t remember the last time I did so much gathering – or any gathering for that matter! But since there are no closures, it’s a pretty quick sew – the slowest thing was hemming all the ruffles!

We did decide to use some scraps of plain navy fabric to add some pockets – because who doesn’t like pockets?! And since I took these photos I also added some waist ties, from the same navy fabric, because whereas I like the loose billowy look, Phoebe wanted to be able to shape it a little at the waist. I used the Hinterland Dress pattern pieces as a guide, and we used it for the neck shaping too as Phoebe has like 8 Hinterlands and likes the neckline, and how you can tie it for a looser or tighter fit as needed.

She was originally going to make the Zadie Jumpsuit for her wedding outfit, but then we saw about buffet dresses being a thing on the sewing bee and it seemed like it would be easier to fit, cool to wear if the weather is hot – and you avoid the whole ‘naked on the toilet’ problem you have with jumpsuits!

I really enjoyed sewing this dress, after I got over the stress of cutting into the fabric and praying our measurements were okay! It was nice to sew something for someone else and to do something relatively simple. I definitely have my eye on another of Daisy DIY’s tutorials for some fabric I’ve had for a while in my stash – I’m probably going to do the Gathered Rectangle Dress. I’ve measured my fabric and I just about have enough – and with the hot weather we’ve been having, I think it might need to be my next project! I don’t have any summer dresses really!

My niece wanted to be in the photos too! It looks like the greatest photobomb!

Scrap Busting Pouf

In September New Craft House ran an Instagram challenge called Sew Yourself Sustainable and I joined in with some of the days (I’m terrible at joining in for a whole month for these kinds of challenges) and I pledged that I would make a Pouf out of some scraps and I actually did it! ZOMG!

These are the fabrics I used, piled on top of one of 2 bin bags full of scraps I’d been hoarding for ages! The blue and gold check was from this skirt refashion into a top which I never really wore because I shrank it in the wash (much sad). The gold denim was leftover from my first mustard cleo, the navy twill was left over from this skirt I made years and years ago, and the blue and black fabric on the right is from my coat.

The pattern is this free one from Closet Case Patterns. I cut out all my top pieces, and the side pieces – there wasn’t quite enough of some of the fabrics to make the sides completely match with the top, but both top and sides follow a pattern rather than being random. As instructed in the pattern, I overlocked all the edges of the pieces before I started sewing them together.

I failed to really take any more progress pictures, but I left off the optional piping and the bottom is completely made of the navy twill as I had the most of that left. I also put a zip from my stash in the bottom so I could stuff the pouf and then zip it closed. I didn’t (yet) make the bag for inside the pouf to hold all the scraps as I wasn’t sure I would need it to be washable, and so far it’s okay, but I could always make a bag some time in the future.

Yay! It has made a real difference to mine and my partner’s comfort while sitting on our sofa – as you can see our tv snug is quite small and we only have a 2 seater sofa so there’s not really anywhere to stretch out……until now!

Be warned, by the way (as I think Closet Case have mentioned) this takes A LOT of scraps to fill up. I had 2 full bin bags full of various scraps and I used all of them! And I think it could even hold more, as the scraps have settled and compressed a little.

These photos weren’t staged at all! 😆

I do love this and it really took an afternoon to cut out (and decide which fabrics were going where) and to sew it! I would definitely recommend doing this if you’ve got tonnes of scraps lying around. I feel like this could also double as a spare seat (almost) if we ever have more than the 2 of us watching tv!

I’m so pleased the New Craft House challenge finally prompted me to make this project – I always put of things like this and I don’t know why. They’re always much quicker than I think and the pay off is totally worth it!


Uses for Fabric Scraps 1: Tailor’s Ham and Sausage

Recently I’ve been thinking about the waste I create through my sewing – I think I’ve mentioned it on here before. One way I’ve decided I can reduce the environmental impact of my sewing is to use up all the scraps I collect. I keep all scraps of fabric from basically everything I’ve made. I took some of the larger pieces of fabric I knew I wasn’t going to use to the fabric and pattern swap at the Great British Sewing Bee Live but I still had a small bin bag (swing bin liner I think it’s called) full of all kinds of scraps. I’m hopefully going to share some ways on here that I am endeavouring to use up said scraps – though I suspect I’ll produce more at a greater rate than I’ll use them up.

My first scrap buster is a tailor’s ham and sausage. I’ve been meaning to make these for ages, and it definitely good timing that I finally got around to it since I’m planning to refashion a suit this month!

The patterns I used are free from Victory patterns – you can download the ham here and the sausage here. There is also a great tutorial on Tilly’s blog, if mine isn’t clear enough to follow!

I used some left over cotton twill from an Elisalex dress I made a couple of years ago (which I also made a 1960s coat from) for the top and calico for the bottom. I also did a layer of calico underneath the green stripes. I think to be a proper ham and sausage one side should be wool and the other side cotton.

You can see on the above couple of photos and the below one that there are darts in each corner of each piece.

So the first step is to sew all the darts, with the right sides of the fabric facing each other.

You can just about see the stitching here.

Here are the ham pieces with the darts all sewn.

This is what they look like from the right side, with the darts all pressed.

So then you put the 2 halves of the ham (and repeat for the sausage) with right sides together, with one half inside the other half, as below.

Pin most of the way around, making sure to leave a gap to stuff it/them.

This is what it looks like once it’s sewn most of the way around – with the gap for the stuffing to go in.

The main way this is a way to use up fabric scraps is that I used scraps as stuffing. I used mostly woven scraps, which were mostly cotton – I figured it shouldn’t be really synthetic fabrics in the stuffing as I thought they might melt if the iron was on a really hot setting. I cut all the scraps into smaller pieces – they ended up as mostly triangles. It took A LOT of fabric to stuff the ham and sausage as they have to be pretty hard once they’re done.

This is what they look like all full and round.

You then need to stitch up the gap, by hand. I made sure to double the thread to make sure it was strong enough to hold all the filling in, without bursting when it’s pressed with an iron.

Ta da! Here they are, all finished and fat and ready for my suit refashion – and for a coat or two when I finally get around to it!

Do you think you’ll use some of your scraps to make a tailor’s ham and sausage? Do you have other ways of using up fabric scraps, which are an inevitable part of sewing clothes?

Save

Save